Writing custom actions

The quest system is designed to be modular and extensible. The actions that come with the plugin are generic and might not be always suitable for your project. If your project needs custom actions, you can create your own in C++ or blueprints.
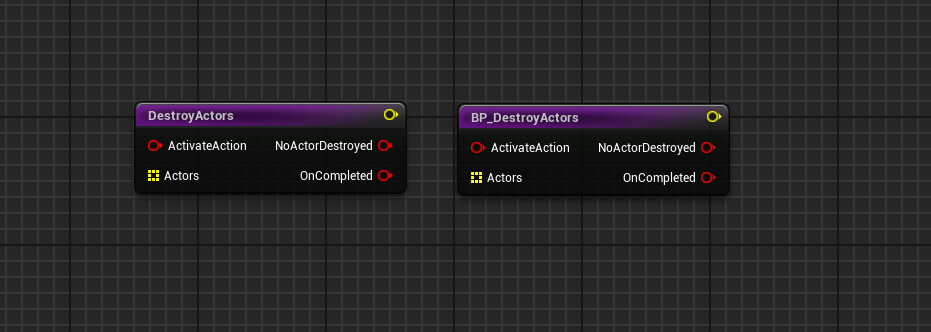
In this example we will create a custom action that takes an array of actors and, if they are derived from the APawn class, destroy them and otherwise do nothing. If any actor was destroyed, we will broadcast the default OnCompleted pin. Otherwise we will boradcast a new NoActorDestroyed pin.
Custom action in C++
Follow the steps below to create the action in C++.
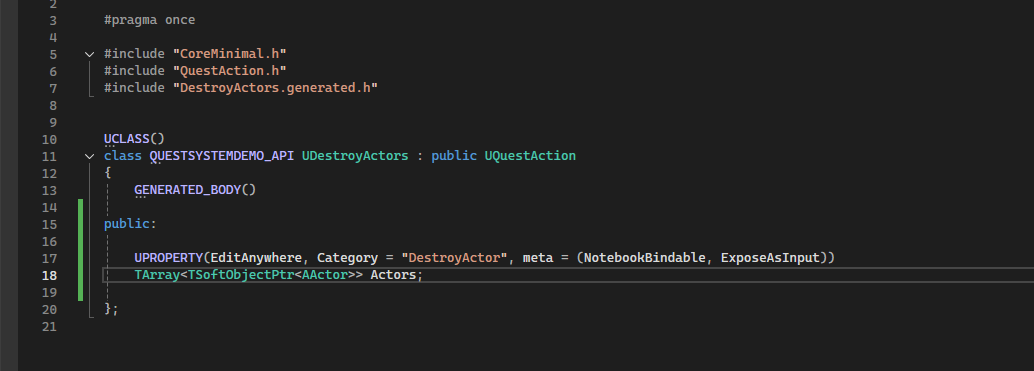
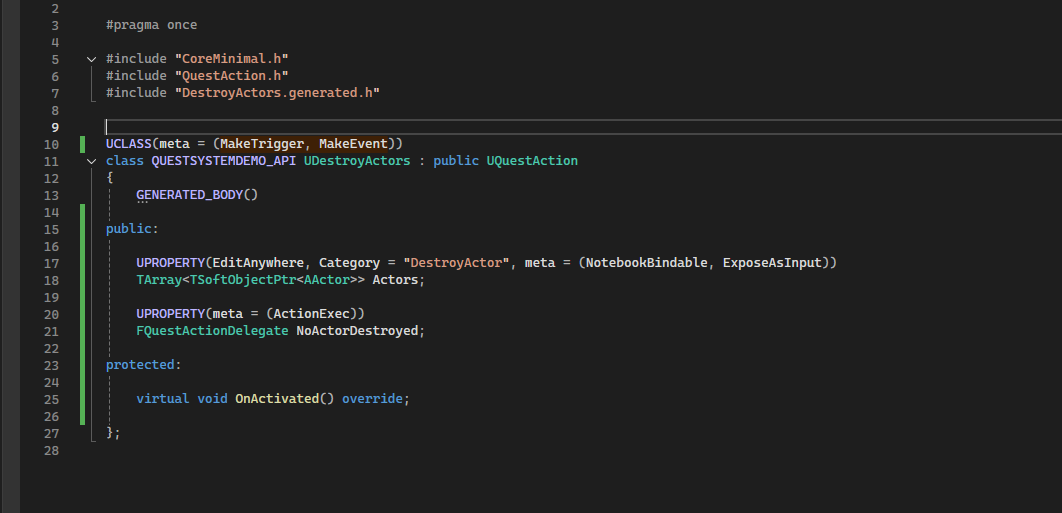
Create a C++ class derived from UQuestAction. Call the class UDestroyActors.
-
Add an array of actor class soft object ptrs to hold the actors that need to be processed for destroying. This needs to be a UProperty so it can be exposed to unreal's reflection system. Add the EditAnywhere or EditDefaultsOnly specifier to edit the property in the details panel. If you want this property to be available as an input in the action node, add the ExposeAsInput meta data specifier. If you want to be able to make notebook bindings to this property, add the NotebookBindable meta data specfier.
-
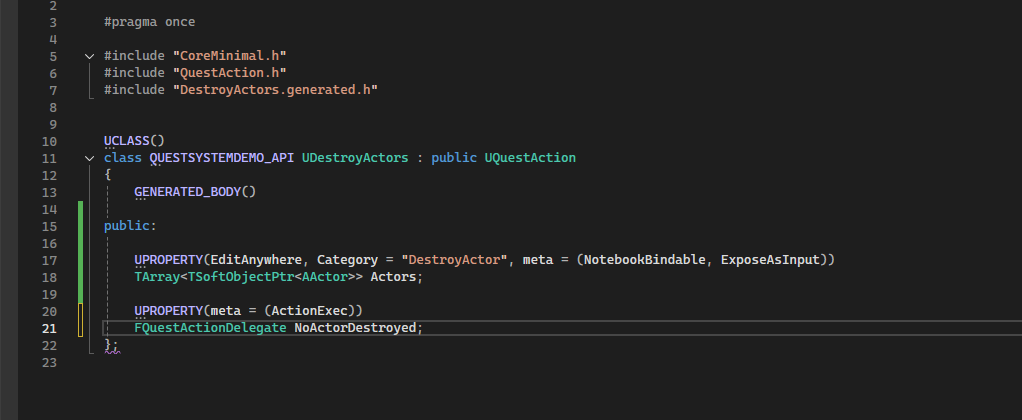
Add a delegate of type FQuestActionDelegate and call it NoActorDestroyed. This will be an output pin that fires when no actor was destroyed. Make it a UProperty and give it the ActionExec meta data specifier.
-
Override the OnActivated function.

-
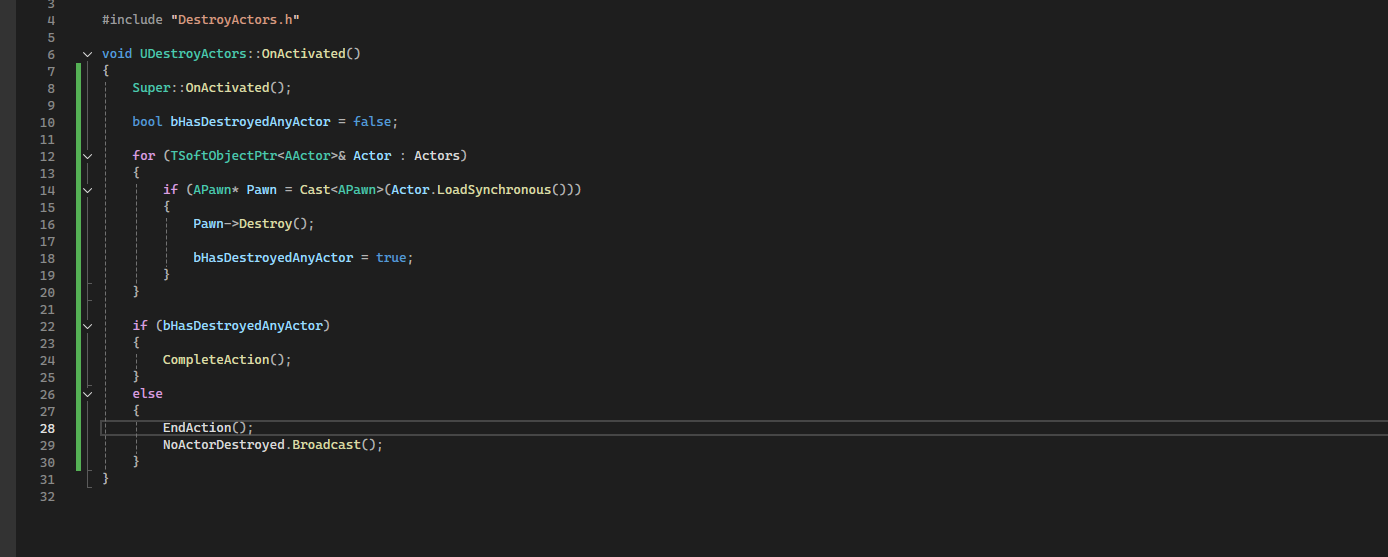
Write the following code in the OnActivated function definition. Make sure to call Super::OnActivated as this processed notebook bindings. The code iterates through all actors and destroyes pawns in the list. If we have destroyed any actors, call CompleteAction and this will end the action and call the default OnCompleted pin. If we have not destroyed any actors, call EndAction and broadcast the NoActorDestroyed delegate.
-
If you need triggers and events of this action type, add MakeTrigger and MakeEvent meta data specifiers in the UCLASS macro.
Your custom action is ready! it can now be used inside the quest graph.
Custom action in Blueprints
Follow the steps below to create the action in blueprints.
Create a blueprint class derived from UQuestAction. Call the class BP_DestroyActors.
-
Add an array of actor class soft object ptrs to hold the actors that need to be processed for destroying. If you want this property to be available as an input in the action node, set Expose As Input to true in the variable details panel. If you want to be able to make notebook bindings to this property, set Notebook Bindable to true in the variable details panel.
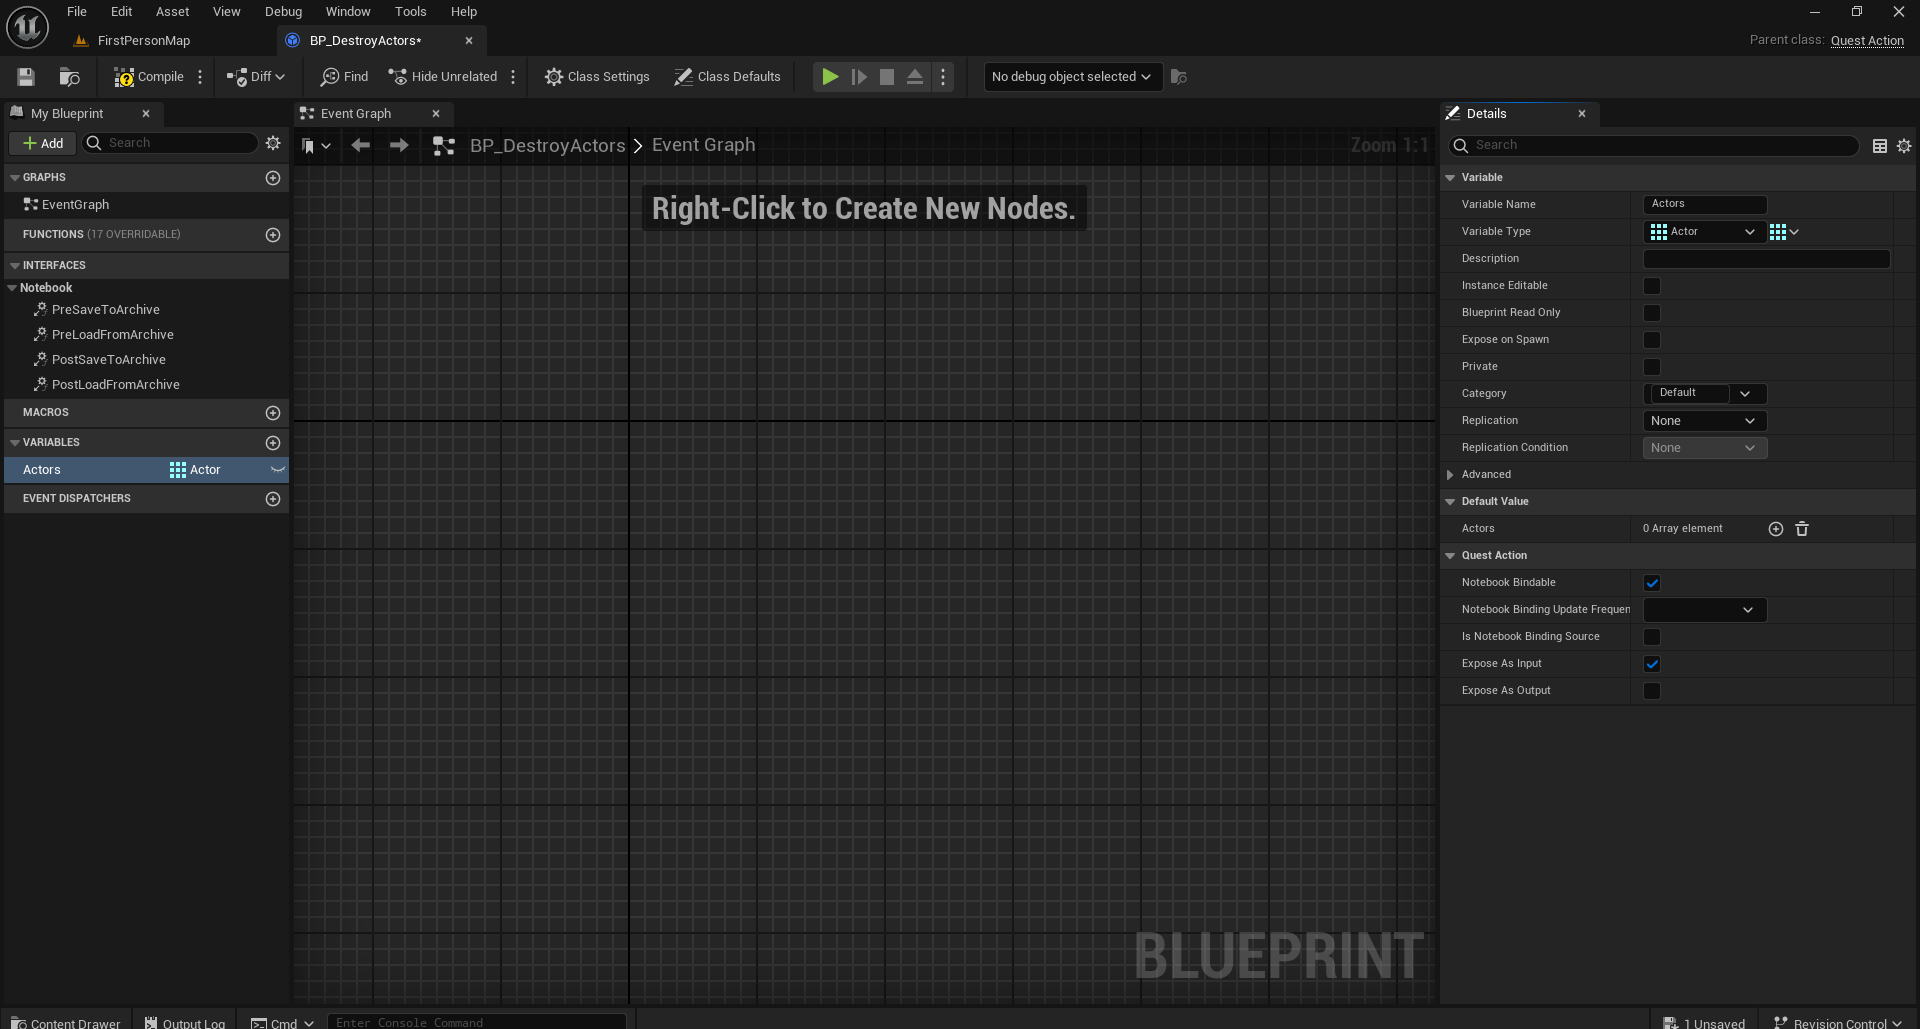
-
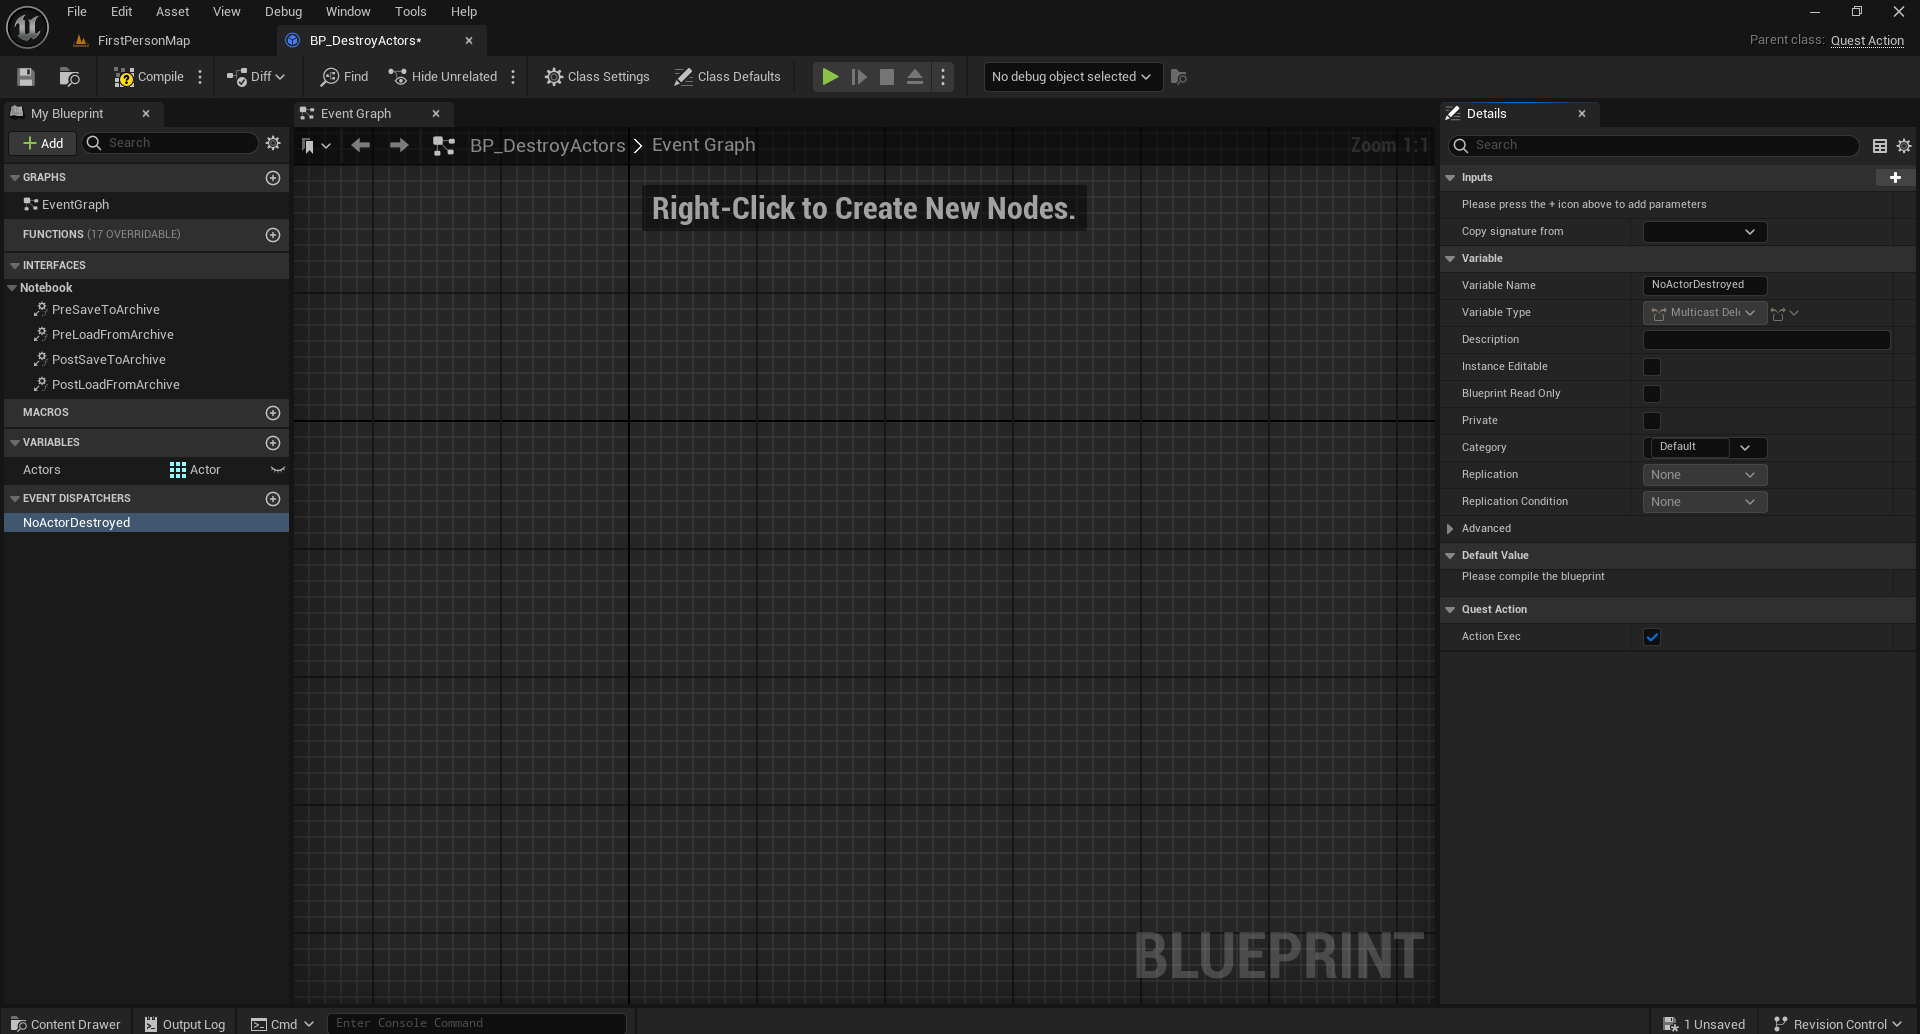
Add an Event Dispatcher and call it NoActorDestroyed. This will be an output pin that fires when no actor was destroyed. Set Action Exec to true in the variable details panel.
-
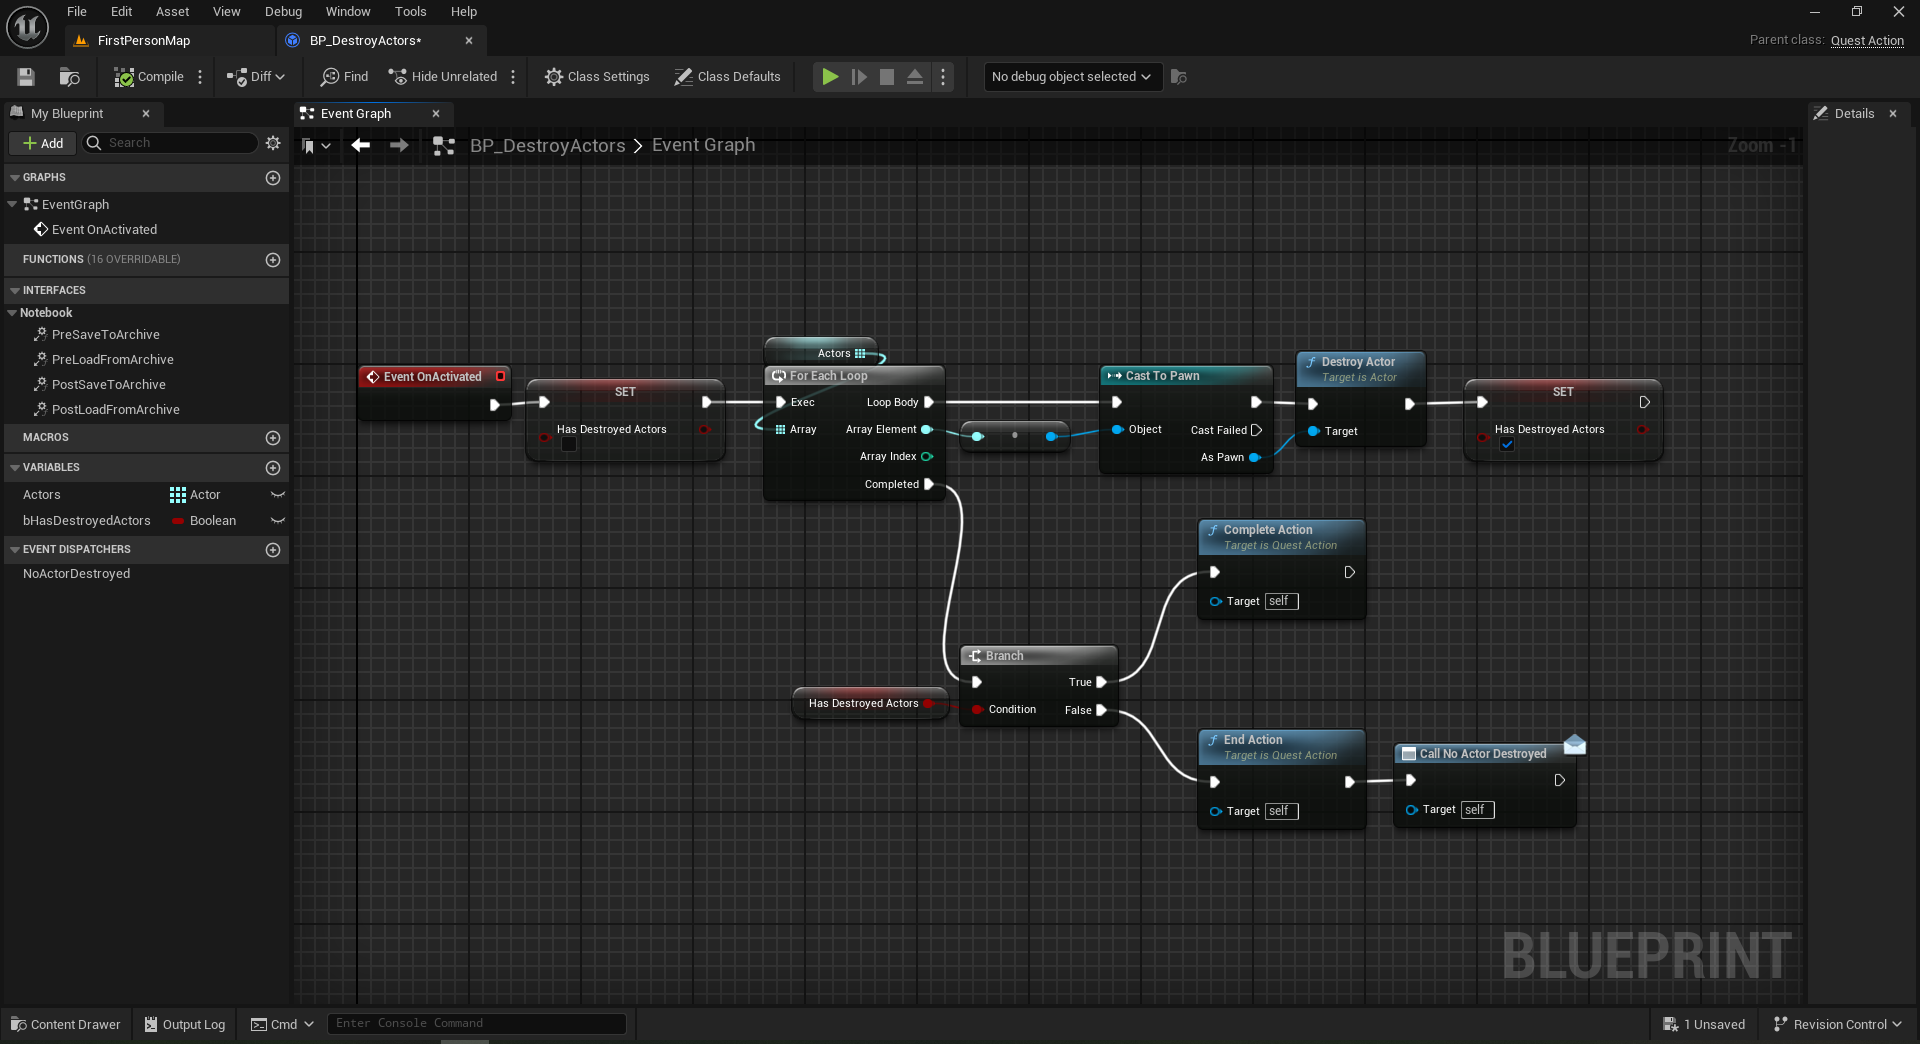
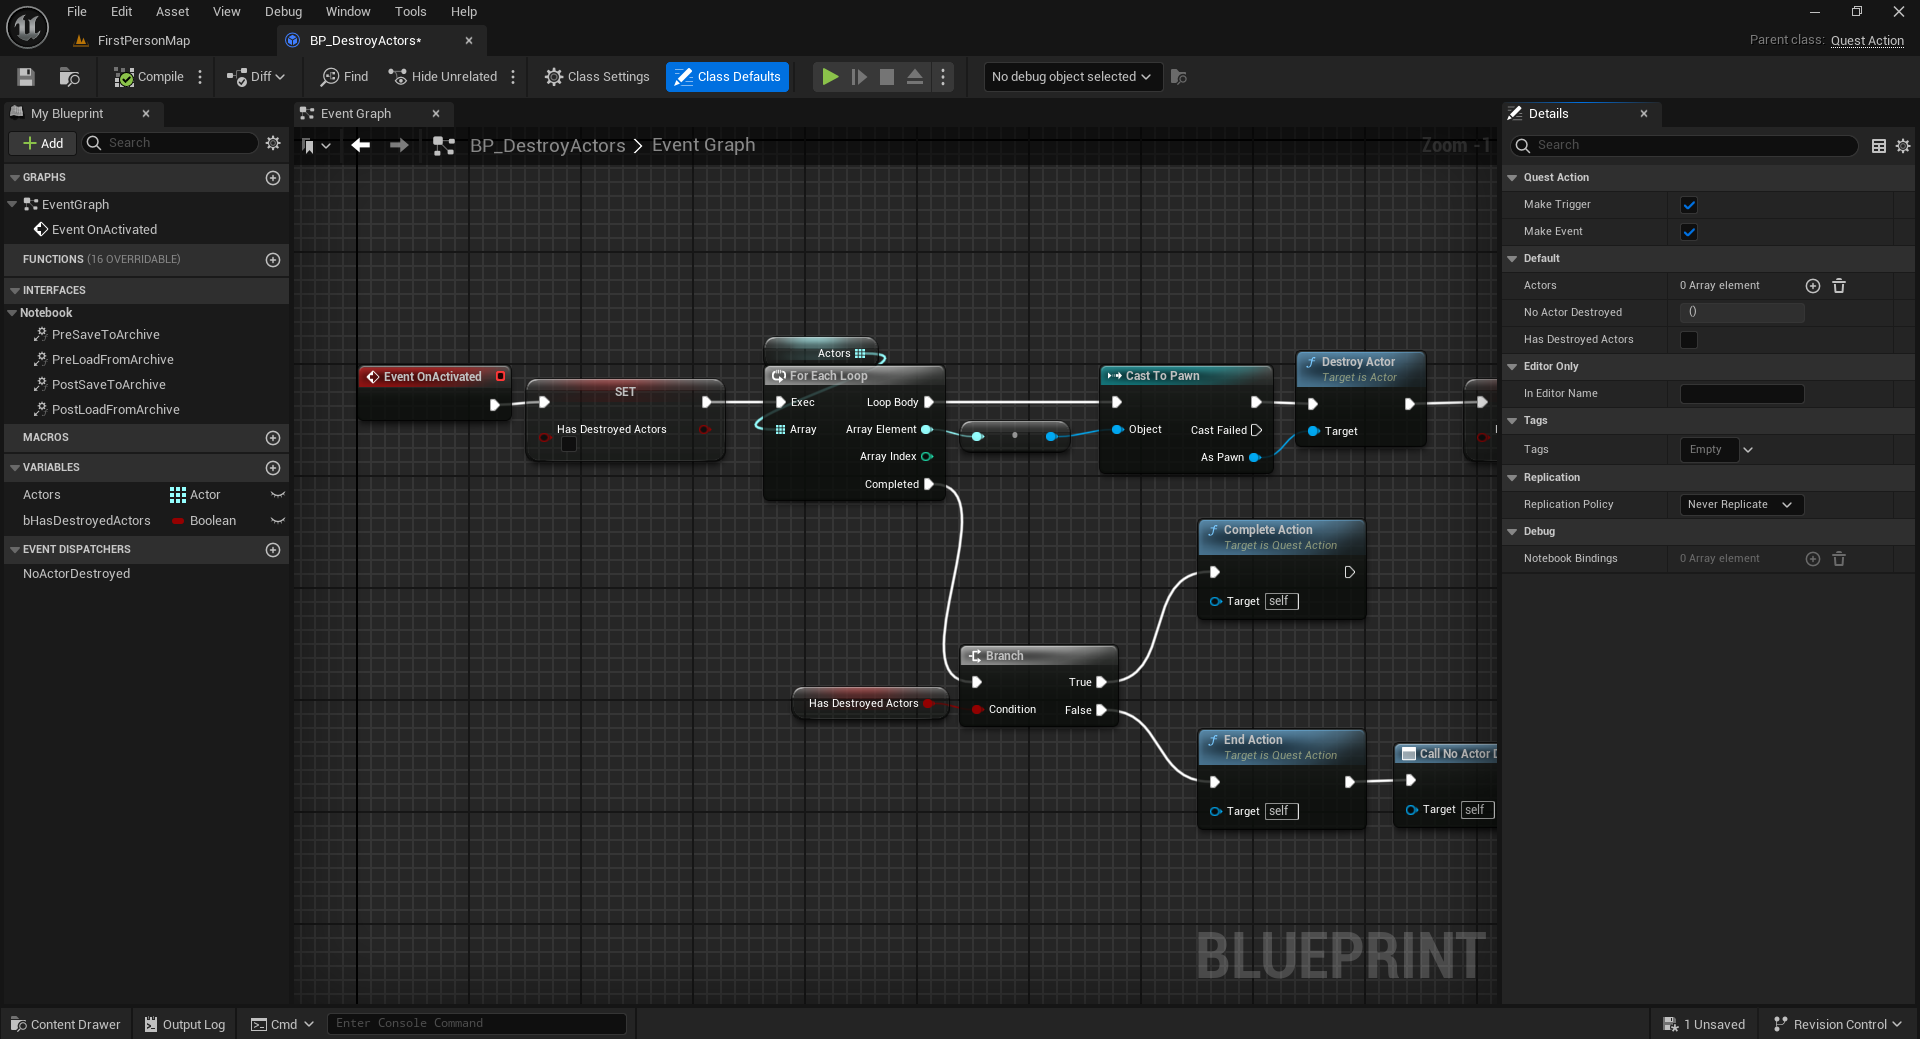
Override the OnActivated function. Script the function as shown below. The code iterates through all actors and destroyes pawns in the list. If we have destroyed any actors, call CompleteAction and this will end the action and call the default OnCompleted pin. If we have not destroyed any actors, call EndAction and broadcast the NoActorDestroyed delegate.
-
If you need triggers and events of this action type, select Class Defaults and set Make Trigger and Make Event to true.
-
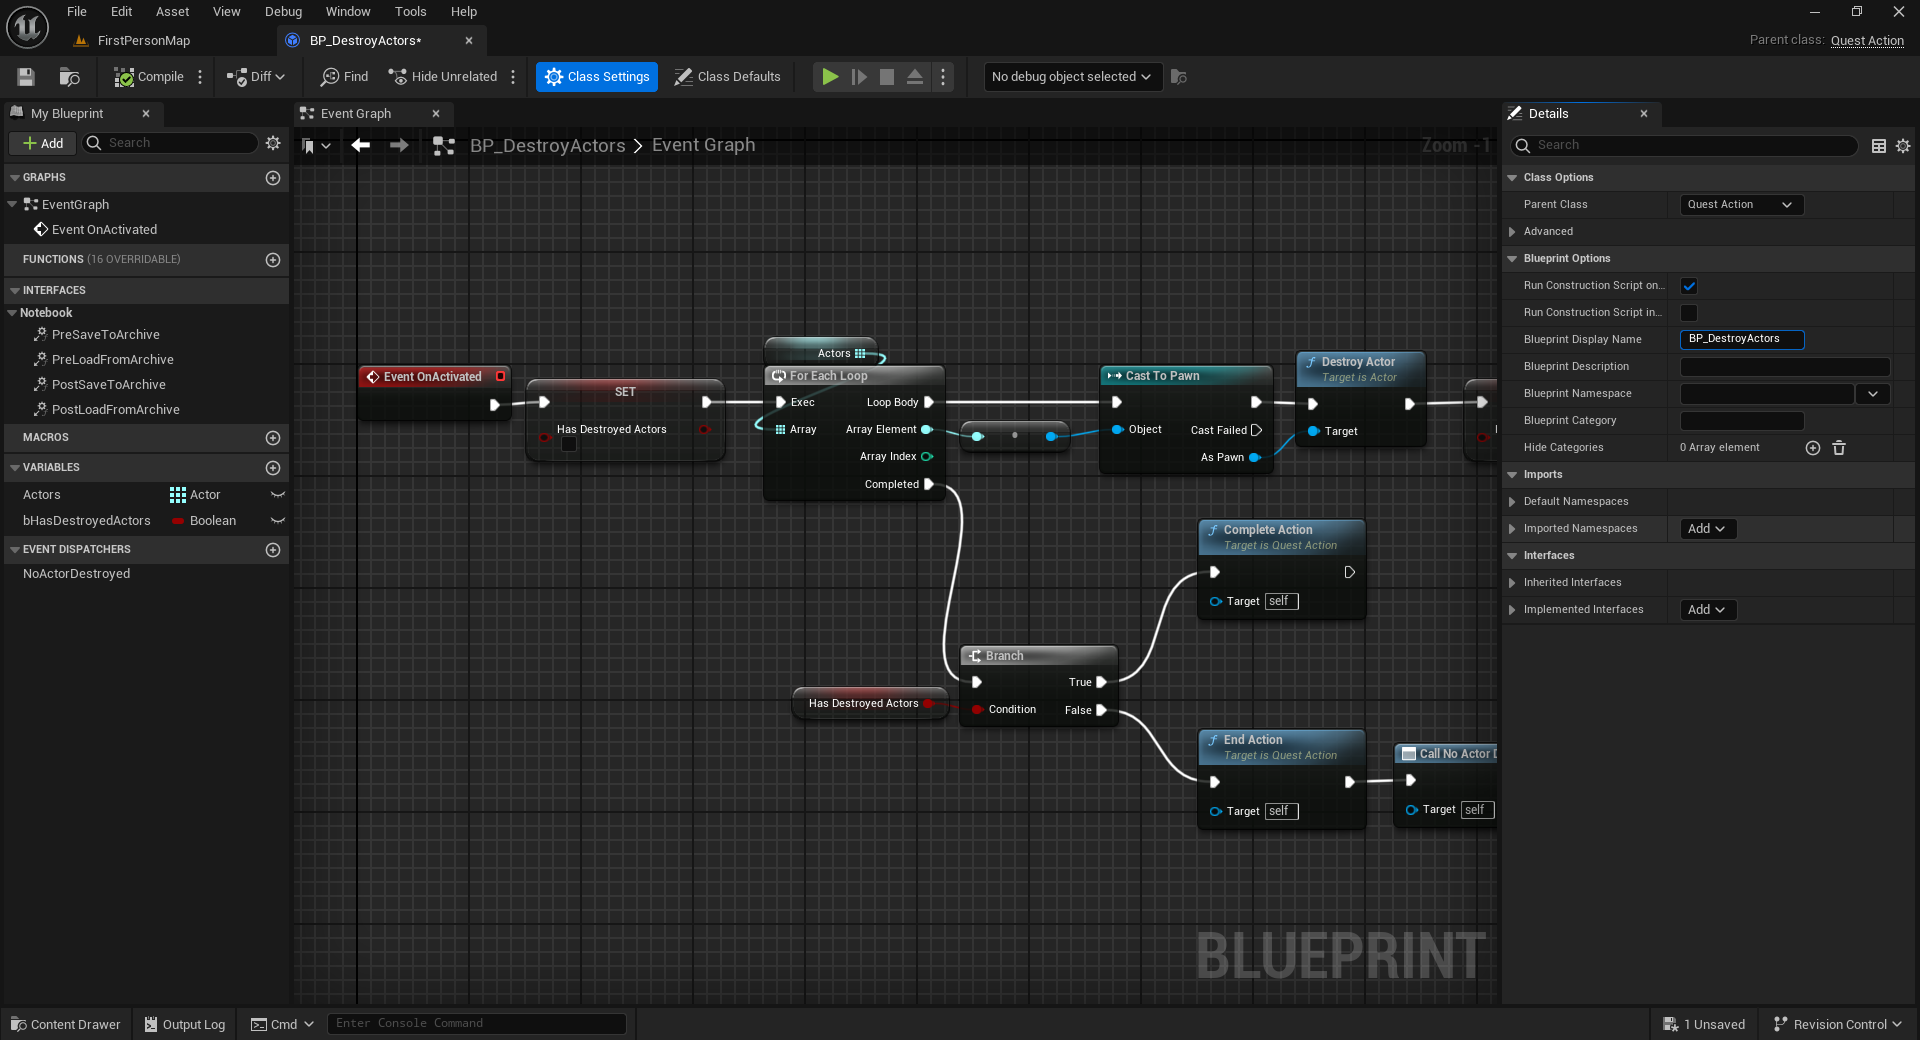
The default display name is the class name UE assigns to blueprint generated classes. To override it, go to Class Settings and set the Blueprint Display Name field to the name you want to display.
Your custom action is ready! It can now be used inside the quest graph. if custom blueprint actions do not show in the quest editor palette, close the editor and reopen to to refresh the pallete.
The actions looks like whats seen in the image below.