Your first quest!

This page walks you through creating and playing your first quest with the Quest system Plugin. To follow along with the instructions, create a project in Unreal Engine based on the First Person Shooter template.
Creating the quest asset
Right click on the content browser and select Quest System -> Action Sequence.
Select Quest as the class for your asset and click Ok.
Name your quest asset. We recommend prefixing your asset with Q_ so your quest asset can be Q_YourFirstQuest.
Double click the asset to open the editor. Your quest asset is ready for you to work with!
An intro to the quest editor
The quest editor interface is similar to other asset editors with graphs in Unreal Engine, like the materials editor and sound editor. The editor has a details panel to show the details of the currently selected object, a graph canvas to script the quest with and a pallete with all available action blocks for the quest.
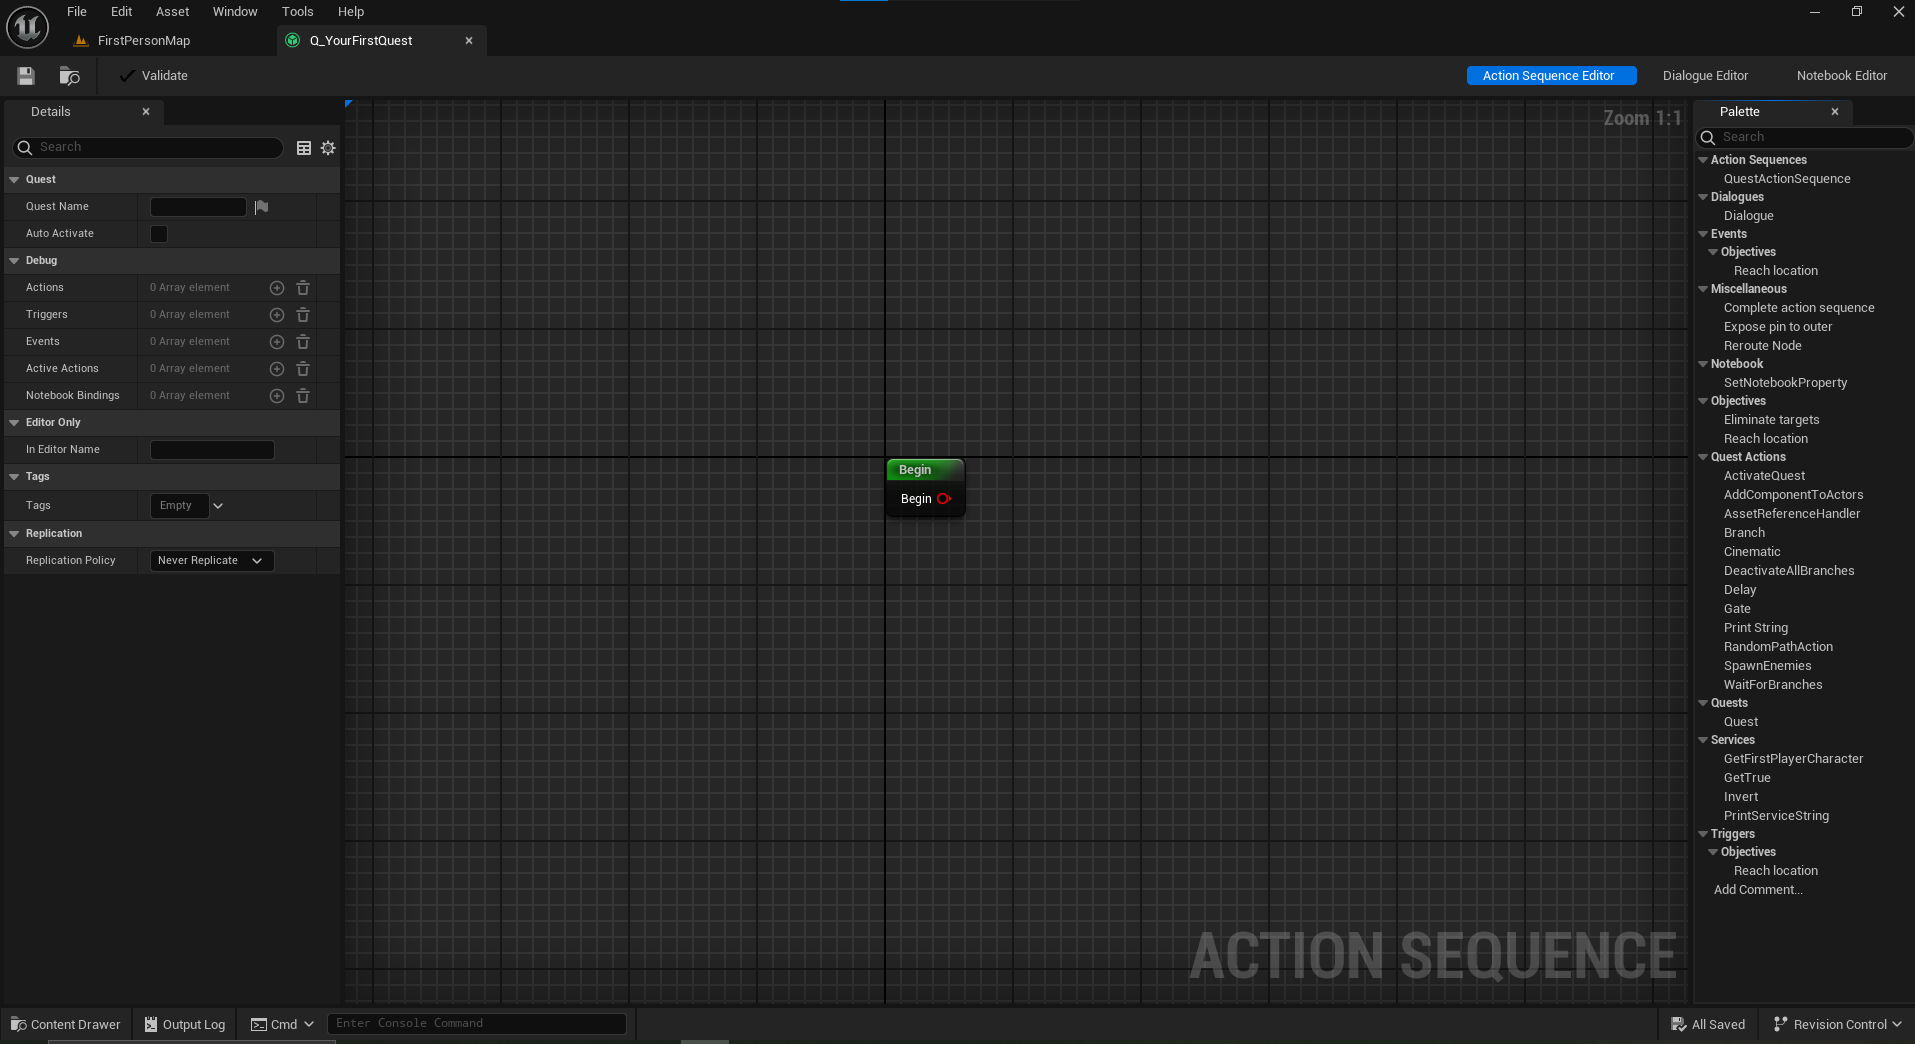
To add an action to your graph, drag and drop the action from the palette, or right click on the graph and select the action from the context menu.
Every quest asset has a begin node. This node will fire when the quest is activated and any actions connected to this node will be activated.
Anatomy of a node

Actions have two types of pins: Execution pins and Property pins. Execution pins are always in Red and Property pins are always in Yellow. All exposed functions for the action will be shown as red input pins. All exposed delegates will be shown as red output pins. All input properties will be shown as yellow input pins and all output properties will be shown as yellow output pins.
Every node has an unnamed pin at the right end of the node's title bar. This pin is a property pin and is the reference to the action represented by the node.
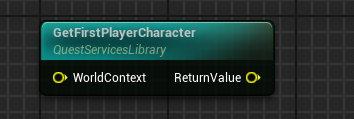
Service nodes do not have Execution pins. To learn more about Services, go to the Intro to Services page.
Example quest
Lets create our very first quest! Follow the steps below to create a simple quest where the character walks to a location, an actor is spawned into the world, the player destroys it, and the quest ends.
We will need an actor that can be destroyed for this quest. Since we are using the first person shooter template, we already have a gun and bullets. Let's create an actor that will be destoyed when hit by a bullet.
-
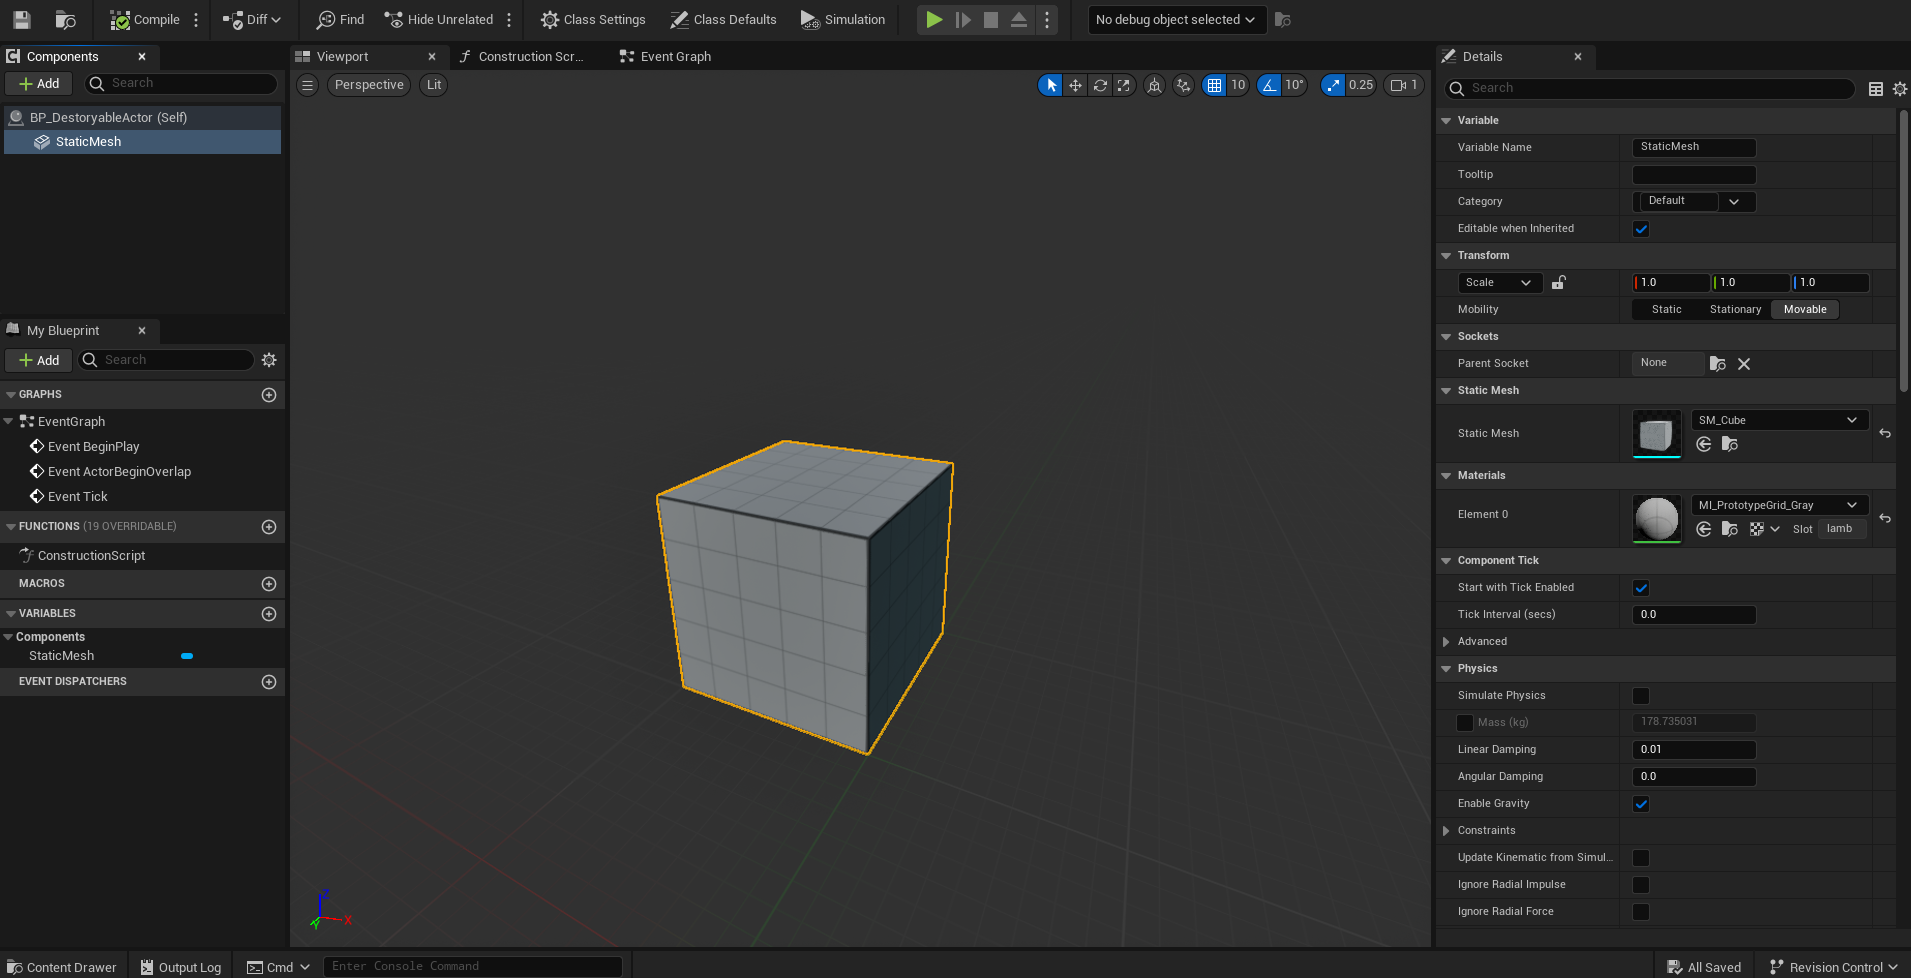
Create an actor blueprint and call it BP_DestroyableActor.
-
Add a static mesh component and set the mesh to a cube mesh.
-
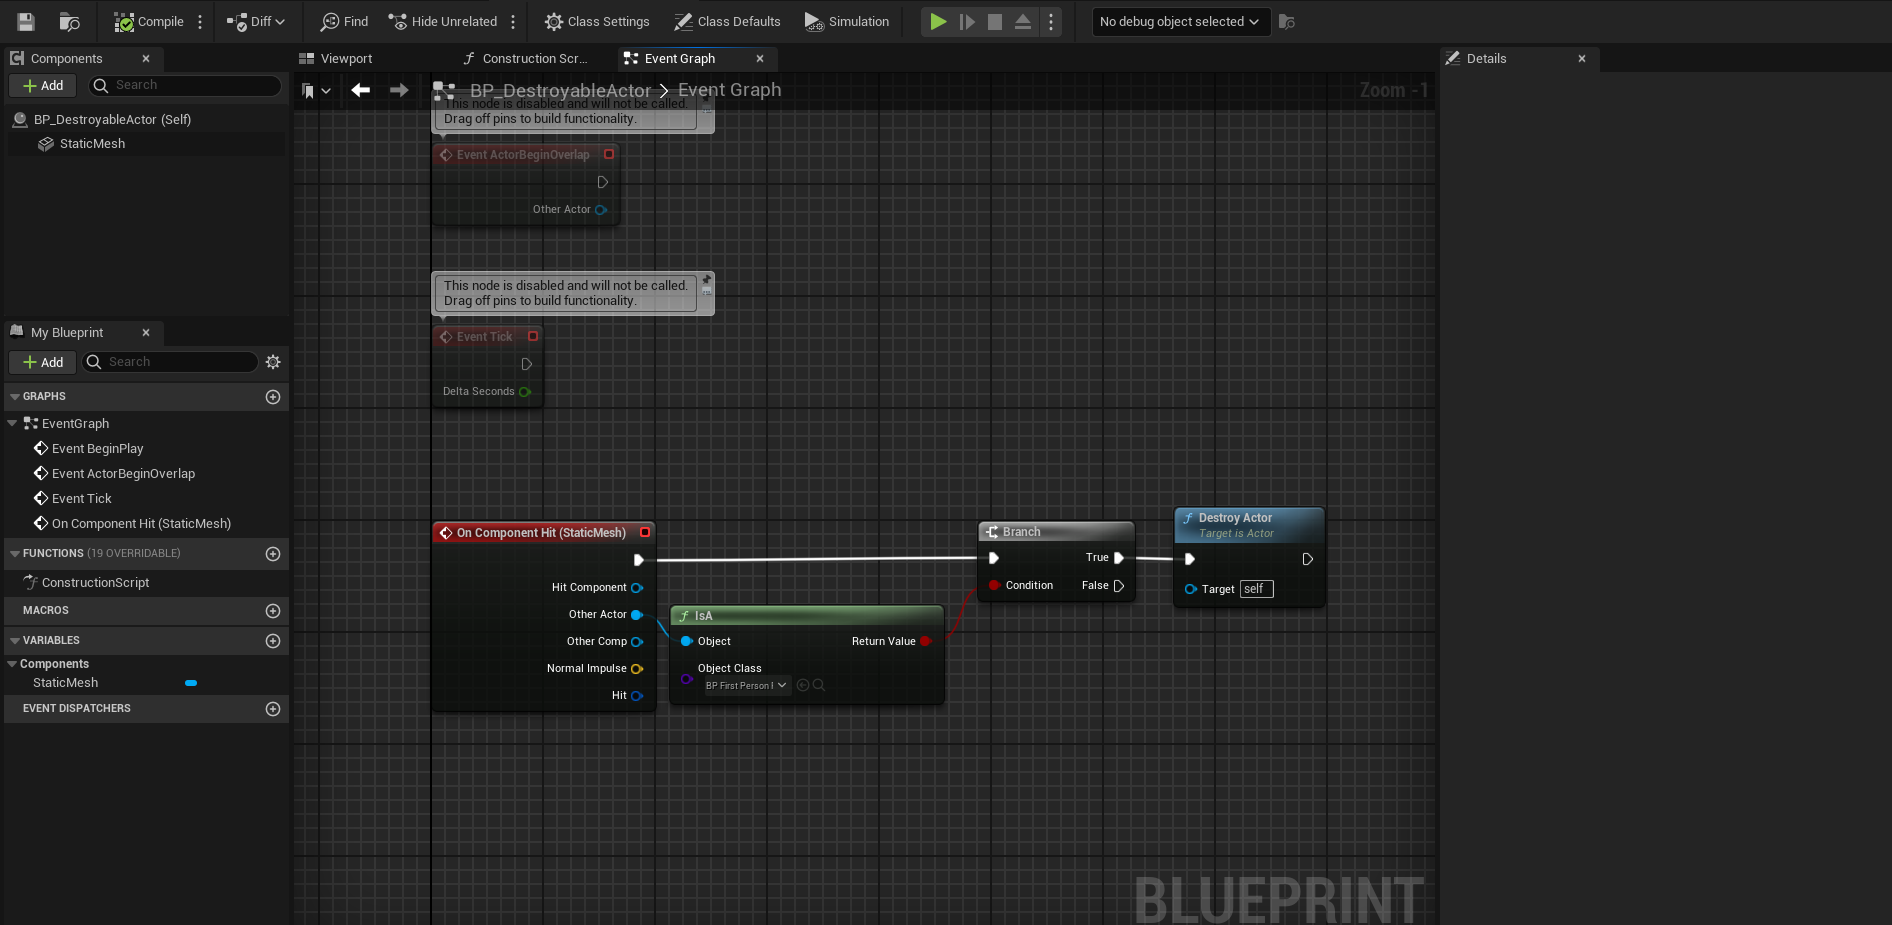
Add an OnHit event for the static mesh component. If the hit actor is a BP_FirstPersonprojectile, Destroy the actor.
The actor is ready. Drop one in the world and try shooting it. It should disappear when hit by a bullet.
Let's setup the world now.
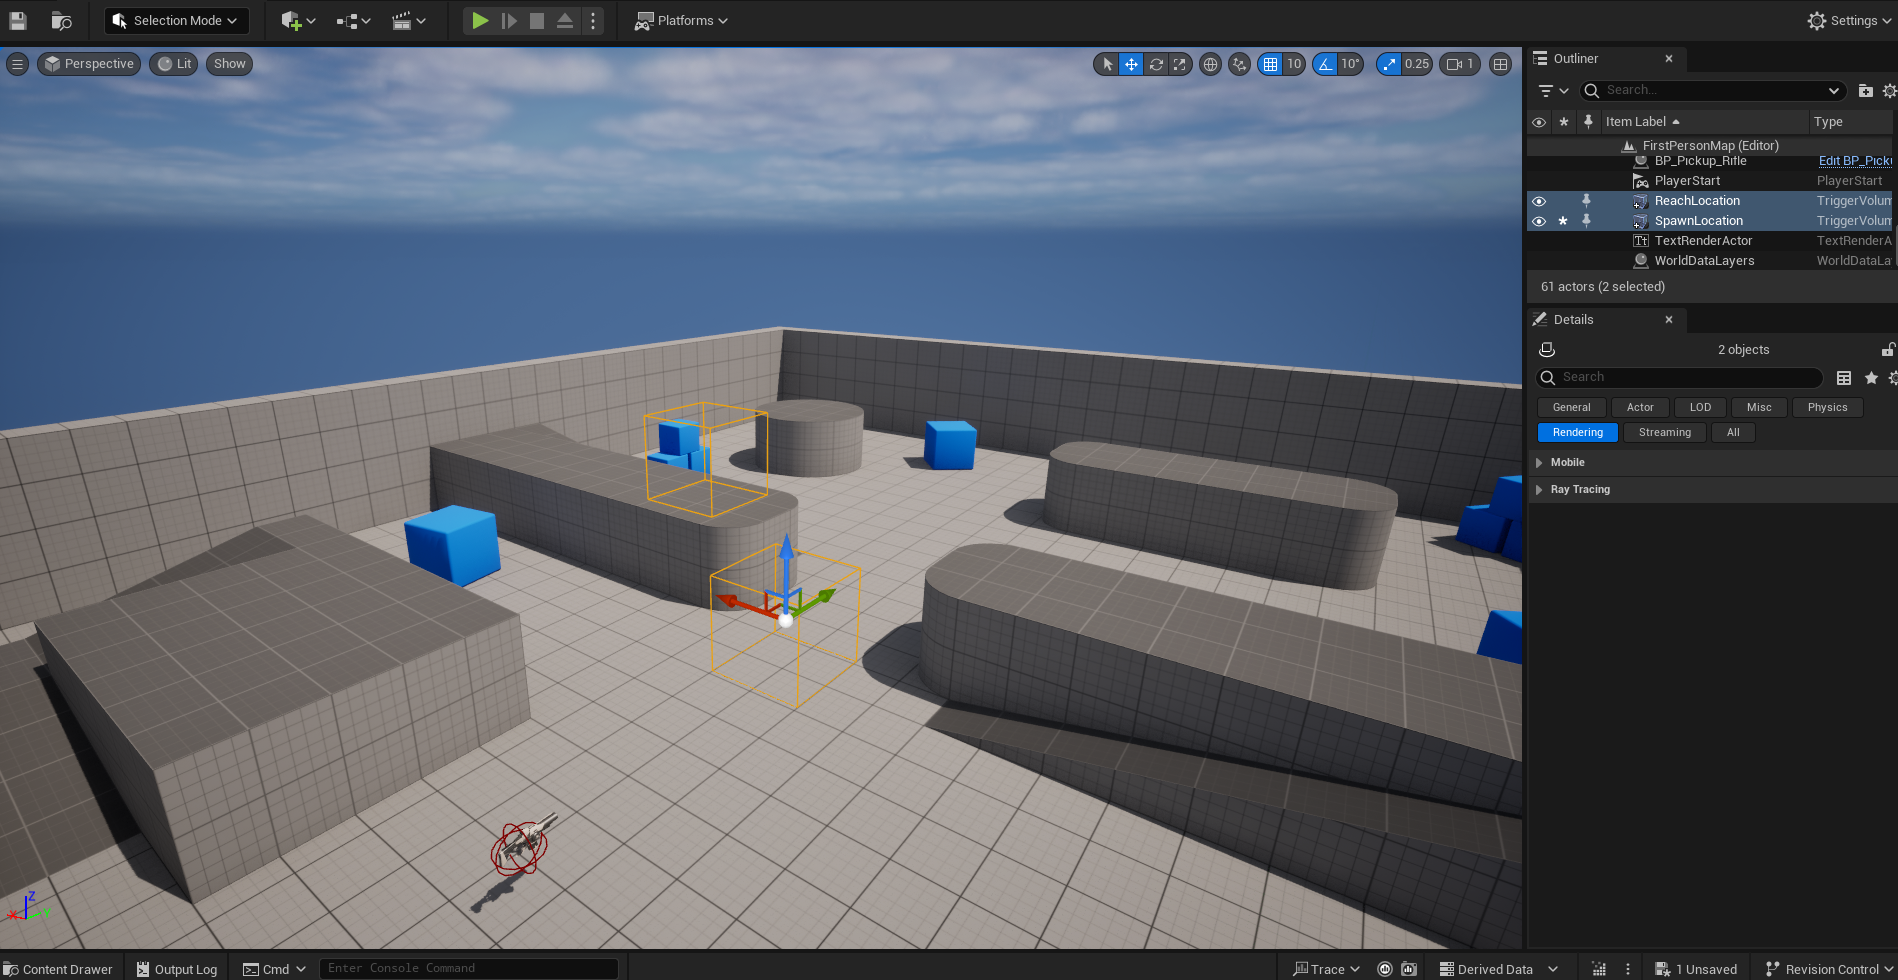
Add a trigger volume to the world at the location you want the character to reach as part of the quest. Call it ReachLocation.
Add another trigger volume at the location where you want to spawn the destroyable actor from the quest graph Call it SpawnLocation..
The world should look something like the one shown below. There is a trigger volume in front of the weapon pickup and another on the platform. The destroyable actor will be spawned on the platform.
Now that the world is setup, lets script the quest.
Open the previously created quest asset.
-
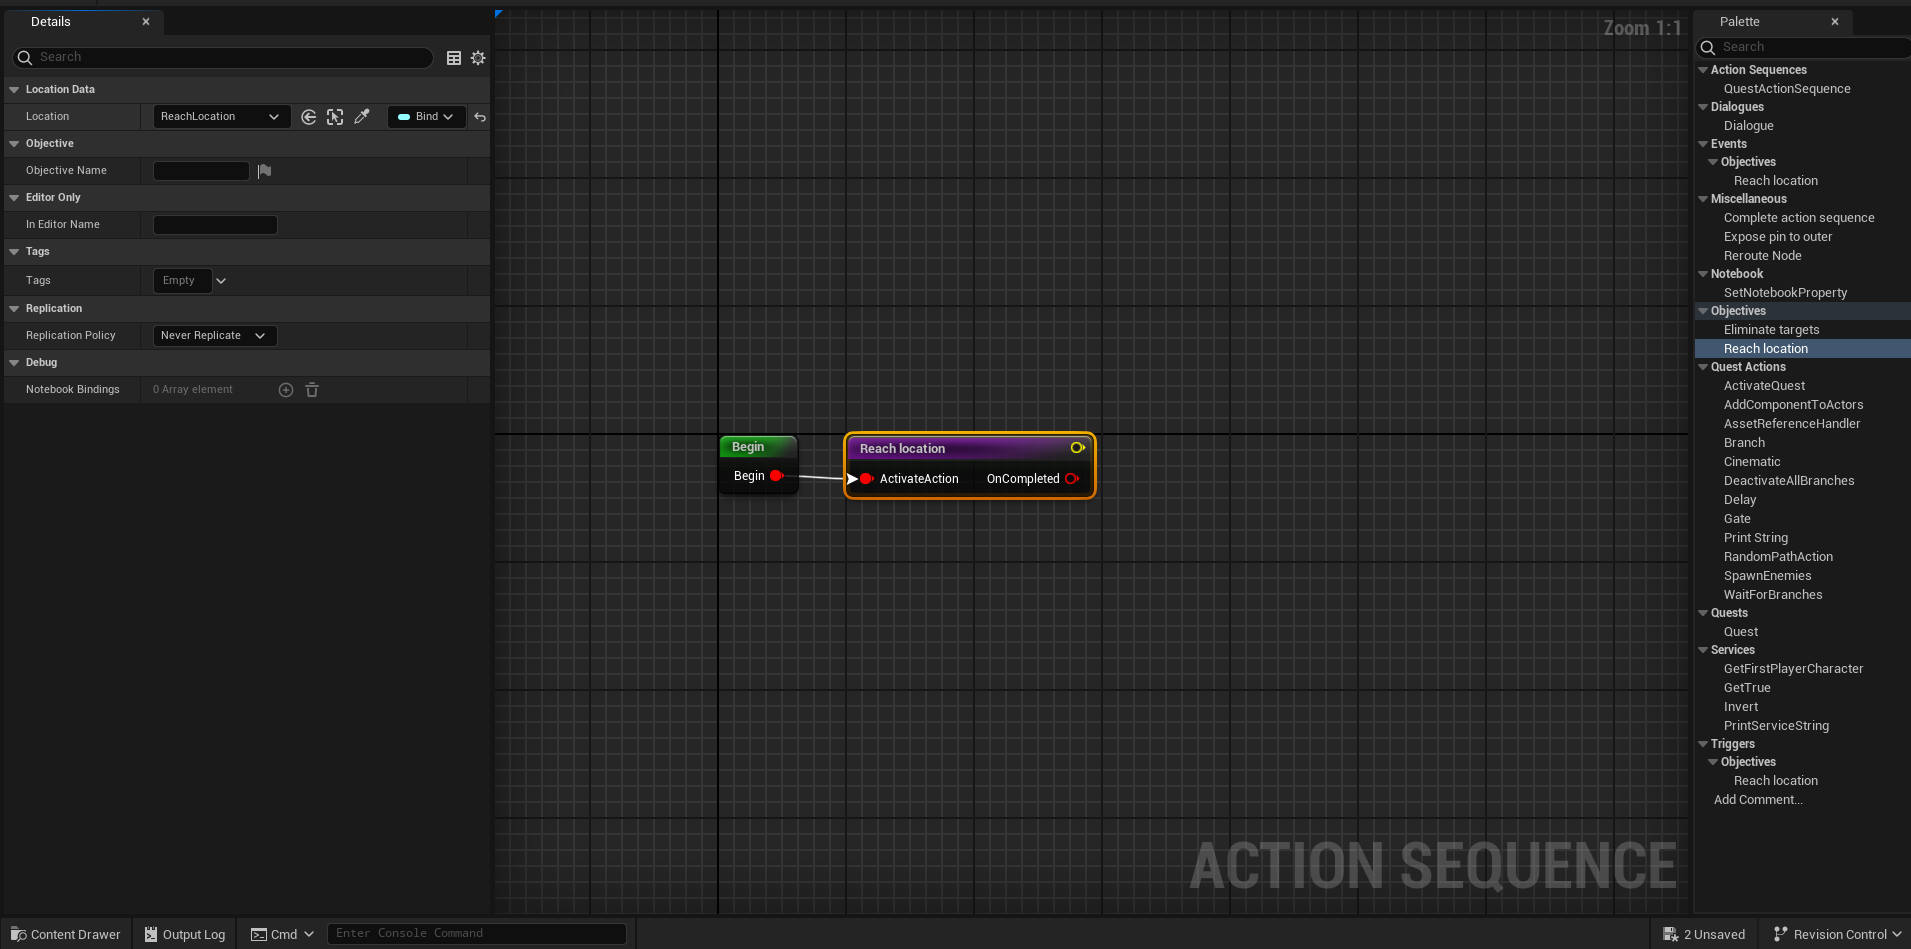
Add a Reach Location node to the graph and connect the begin node's output pin to the activate pin of the new node. In the details panel, set the location to the ReachLocation trigger volume.
-
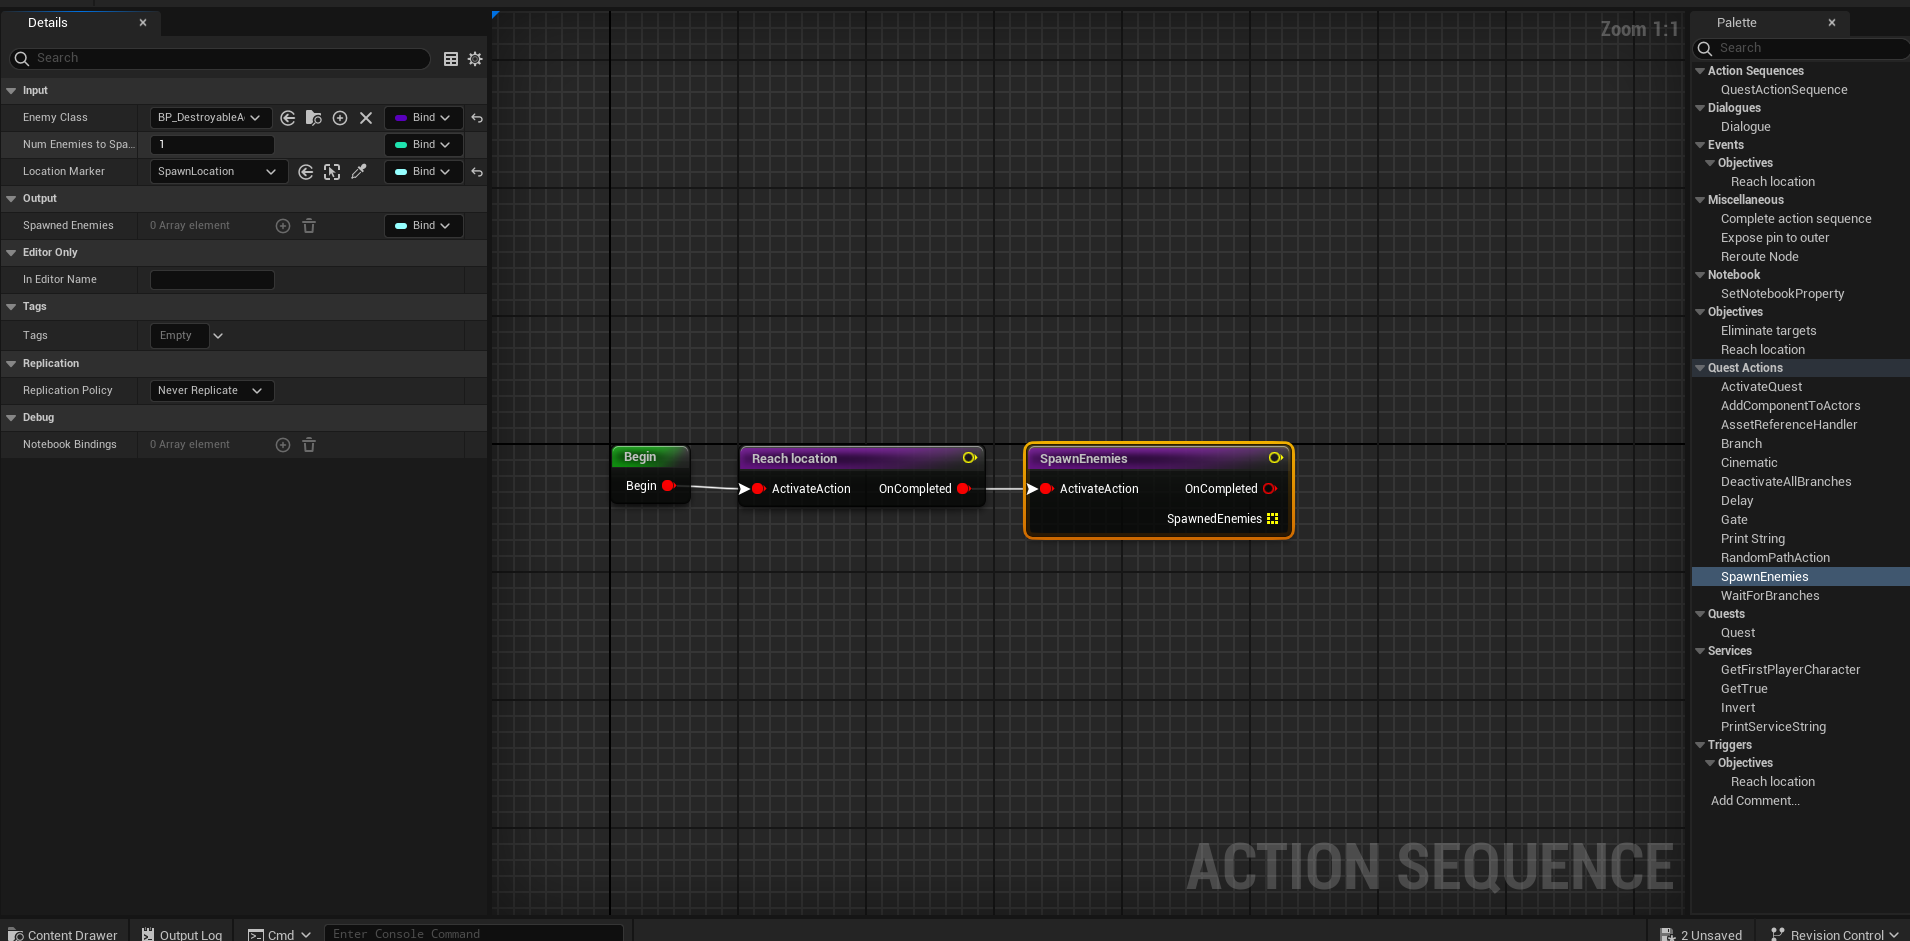
Add a Spawn Enemies node and connect the completed pin of the Reach Location node to the activate pin of the new node. In the details panel, set the actor class to BP_DestroyableActor and the location to the SpawnLocation trigger volume.
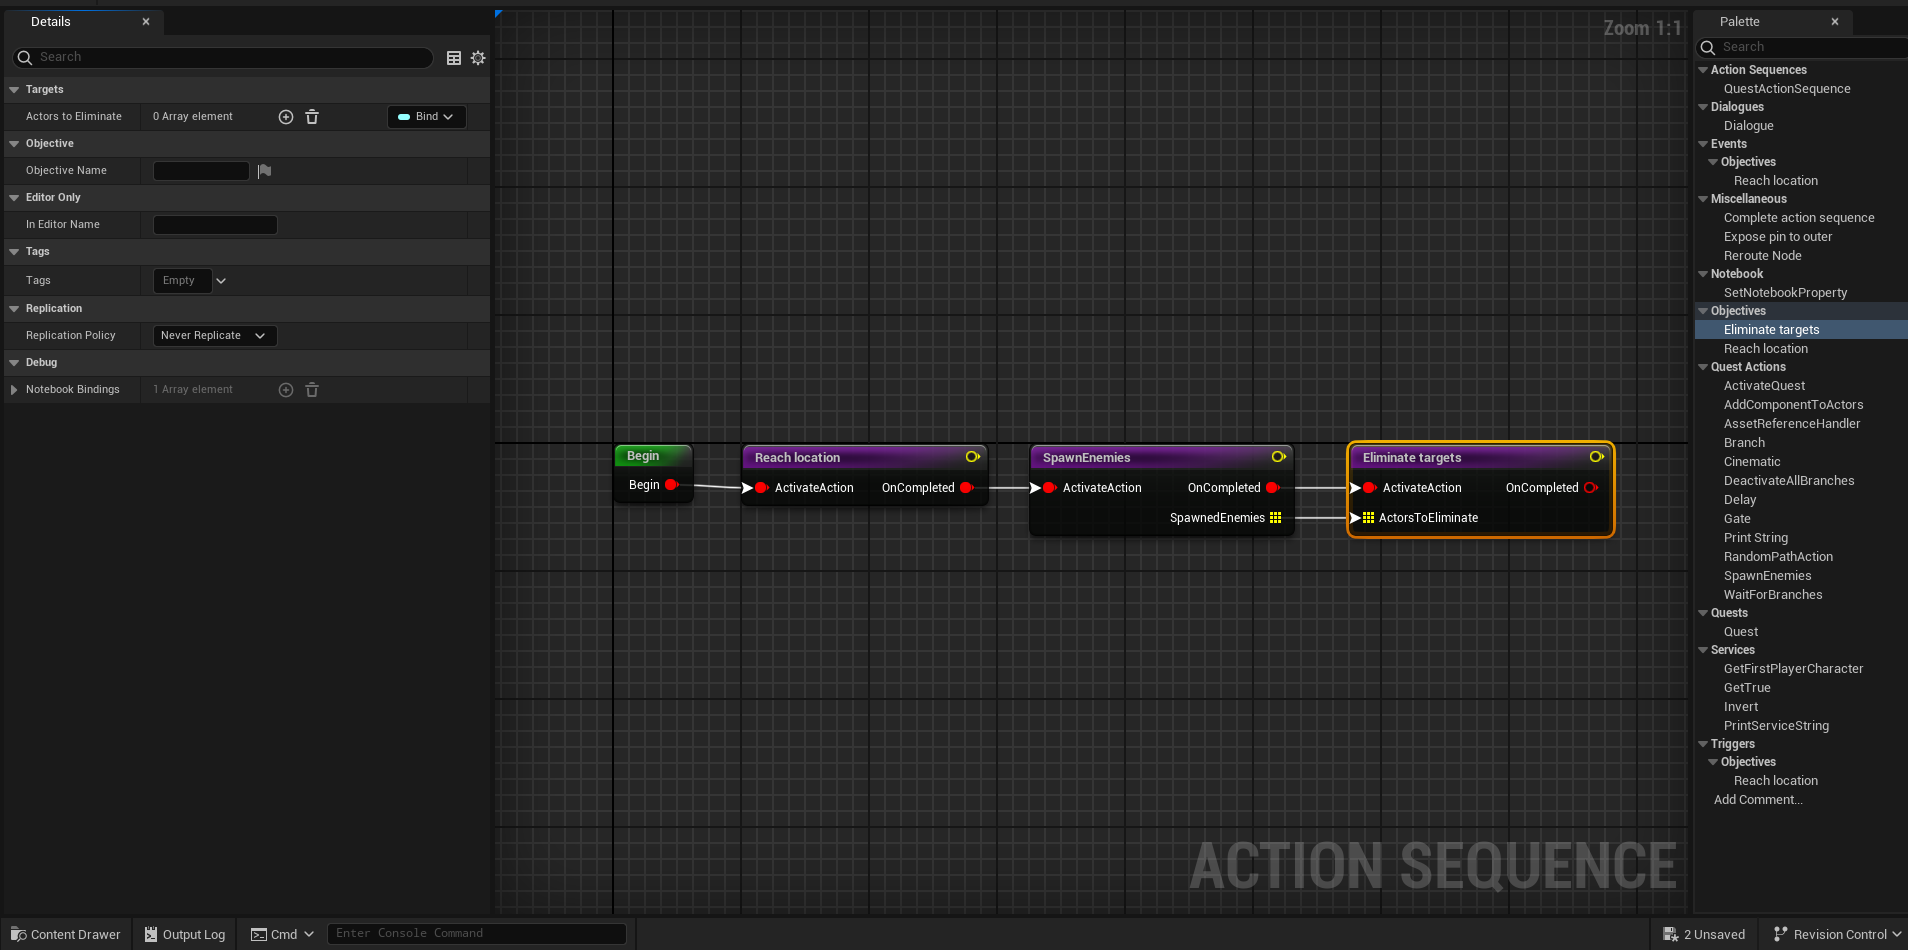
Add an Eliminate Targets node to the graph and connect the Spawn Enemies node's completed pin to the activate pin of the new node. Connect the SpawnedEnemies pin to the ActorsToEliminate pin.
[Important] Add a Complete Action Sequence node. This node is important as this calls the complete function on the quest and marks it as Ended. Without this node, the quest will never end and always be active even if none of its actions are active. Connect the Completed pin of the Eliminate Targets node to the new node.
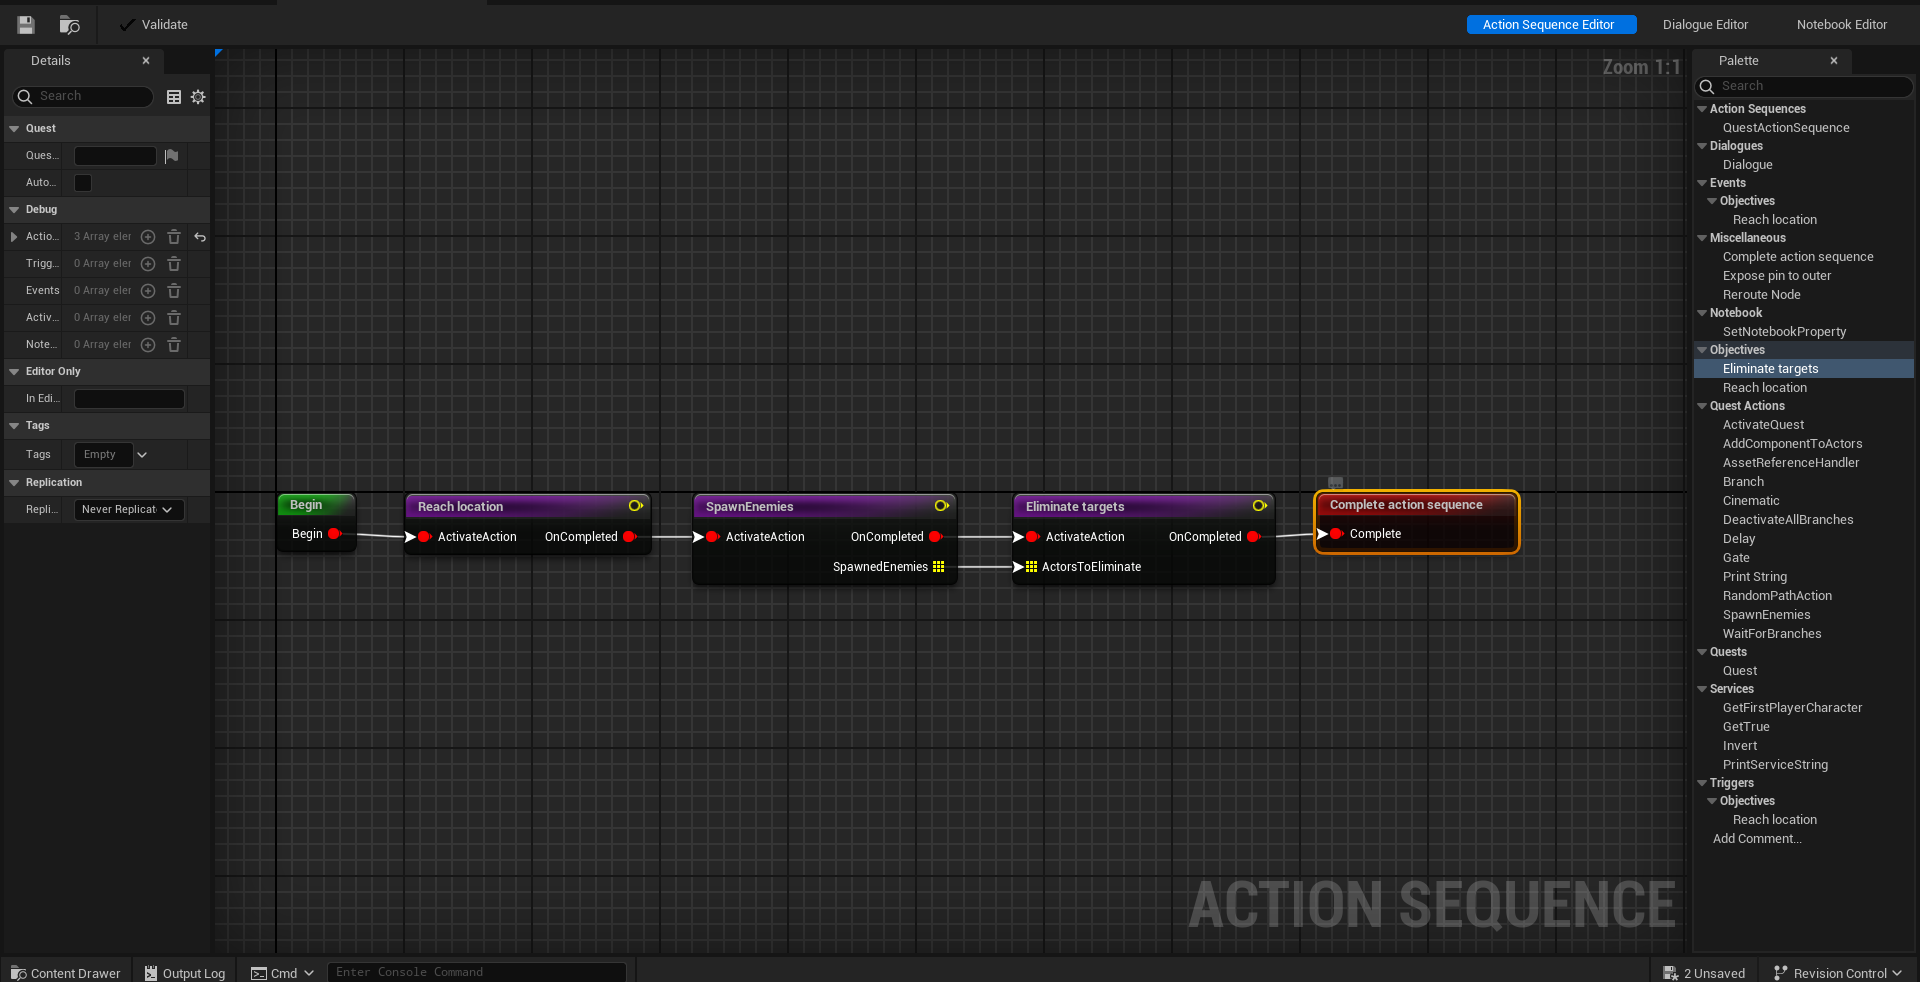
We want this quest to activate automatically. So go to the details panel and set Auto Activate to true.
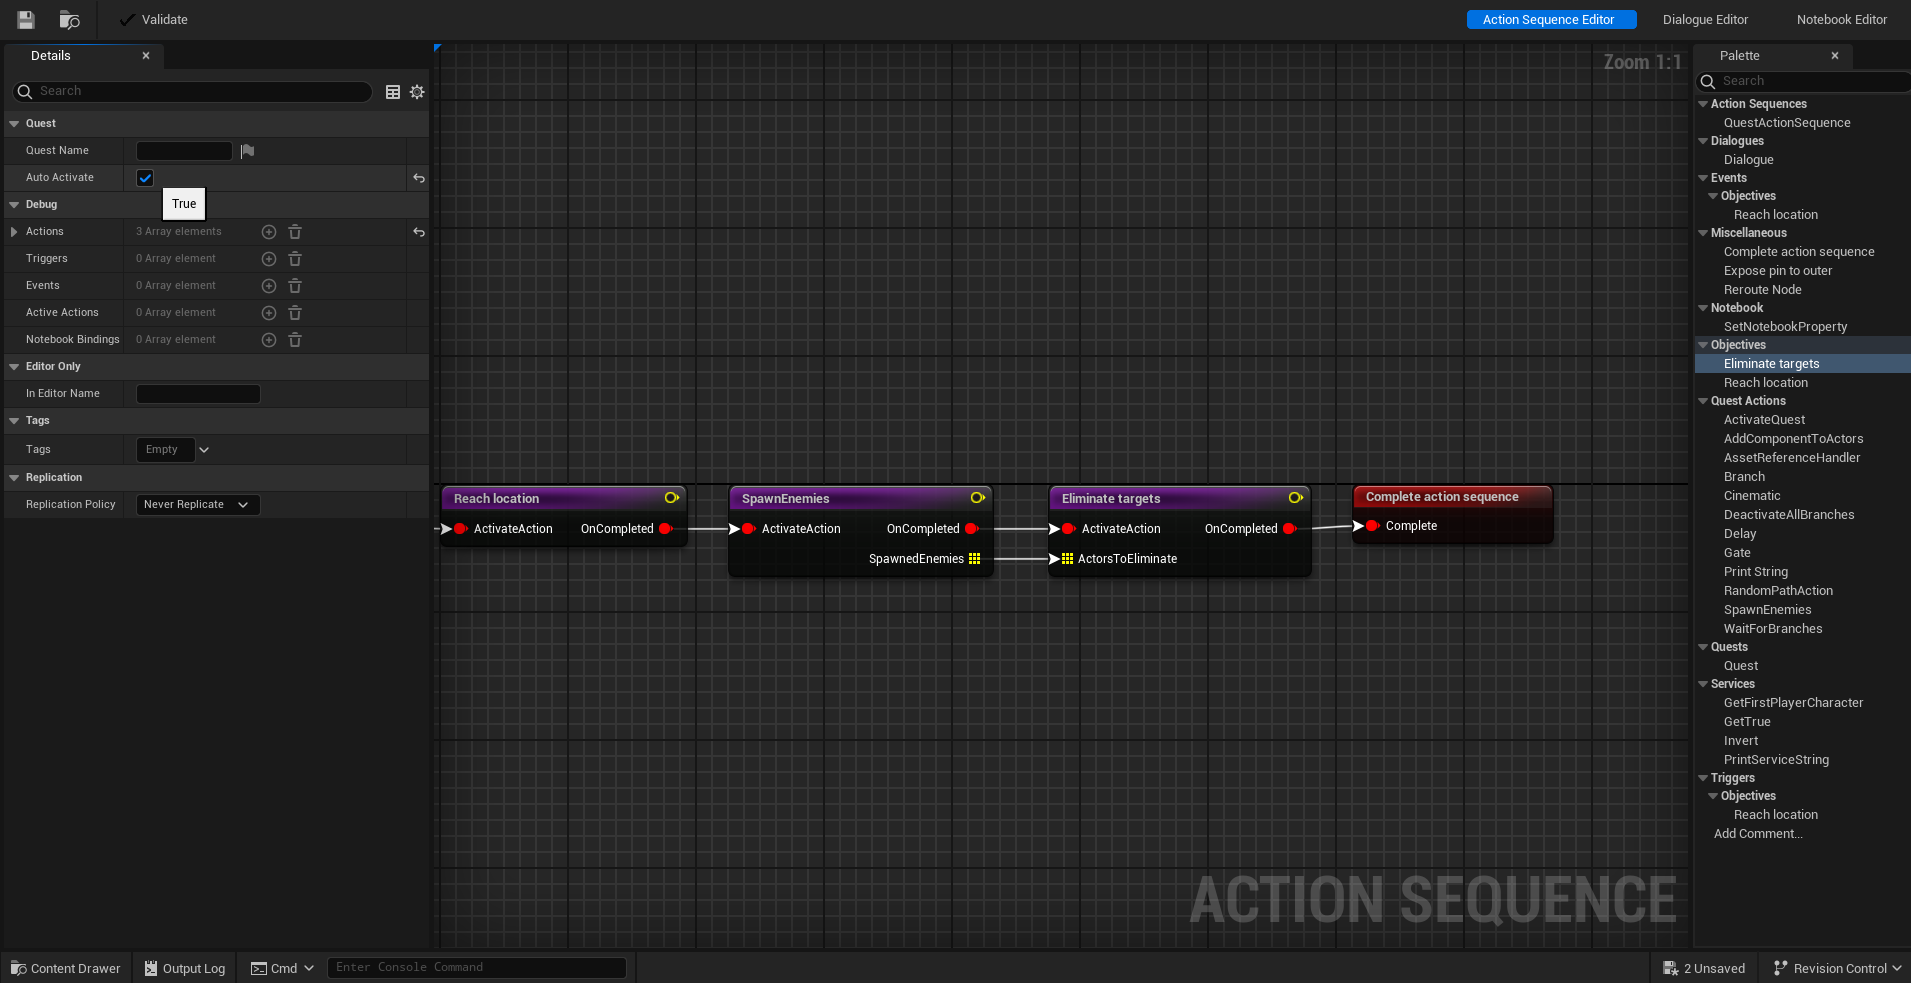
That's it! The quest has been scripted.
Playing the quest
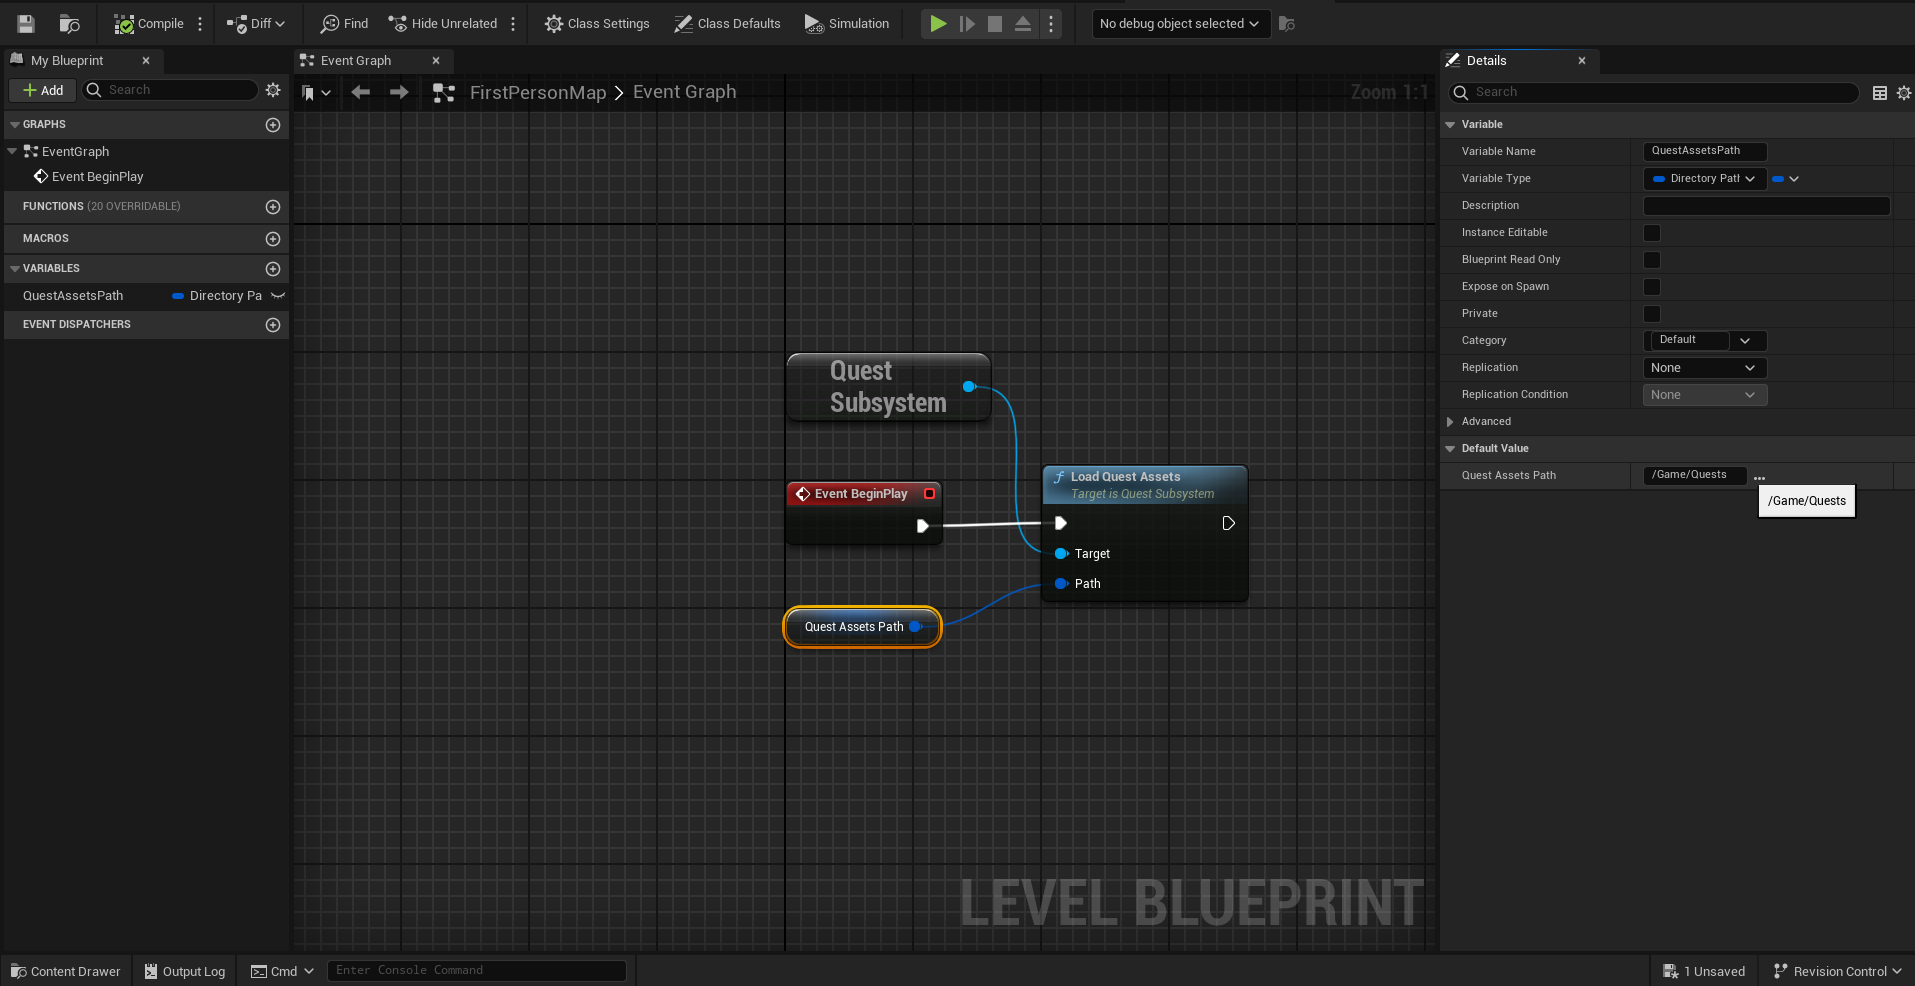
To play the quest, we need to load the quest asset. The best place to load assets might be different for each game, but for this example we will load quests from the level Blueprint. Open the level blueprint and override the function Event BeginPlay. Right click on the graph and search for a reference to the Quest Subsystem and call Load Quest Assets on the Quest Subsystem. It takes an FDirectoryPath argument. Create a variable and set its value to the directory where your quests are stored. In this example, quests are stored in /Game/Quests.
Hit play in the editor to start a PIE session. The quests will load and will be automatically activated and you can play it. Go to the first Trigger volume, watch the "Enemy" get spawned, shoot it to destroy it and the quest should end. The Quest asset's editor can be used to track this.
You have your first quest!