Creating Dialogues

Setting up the dialogue system
The dialogue system needs a dialogue manager and dialogue component to work. Follow the steps below to get the dialogue system ready to handle dialogues. This example assumes we are using the first person template like in the YourFirstQuest example.
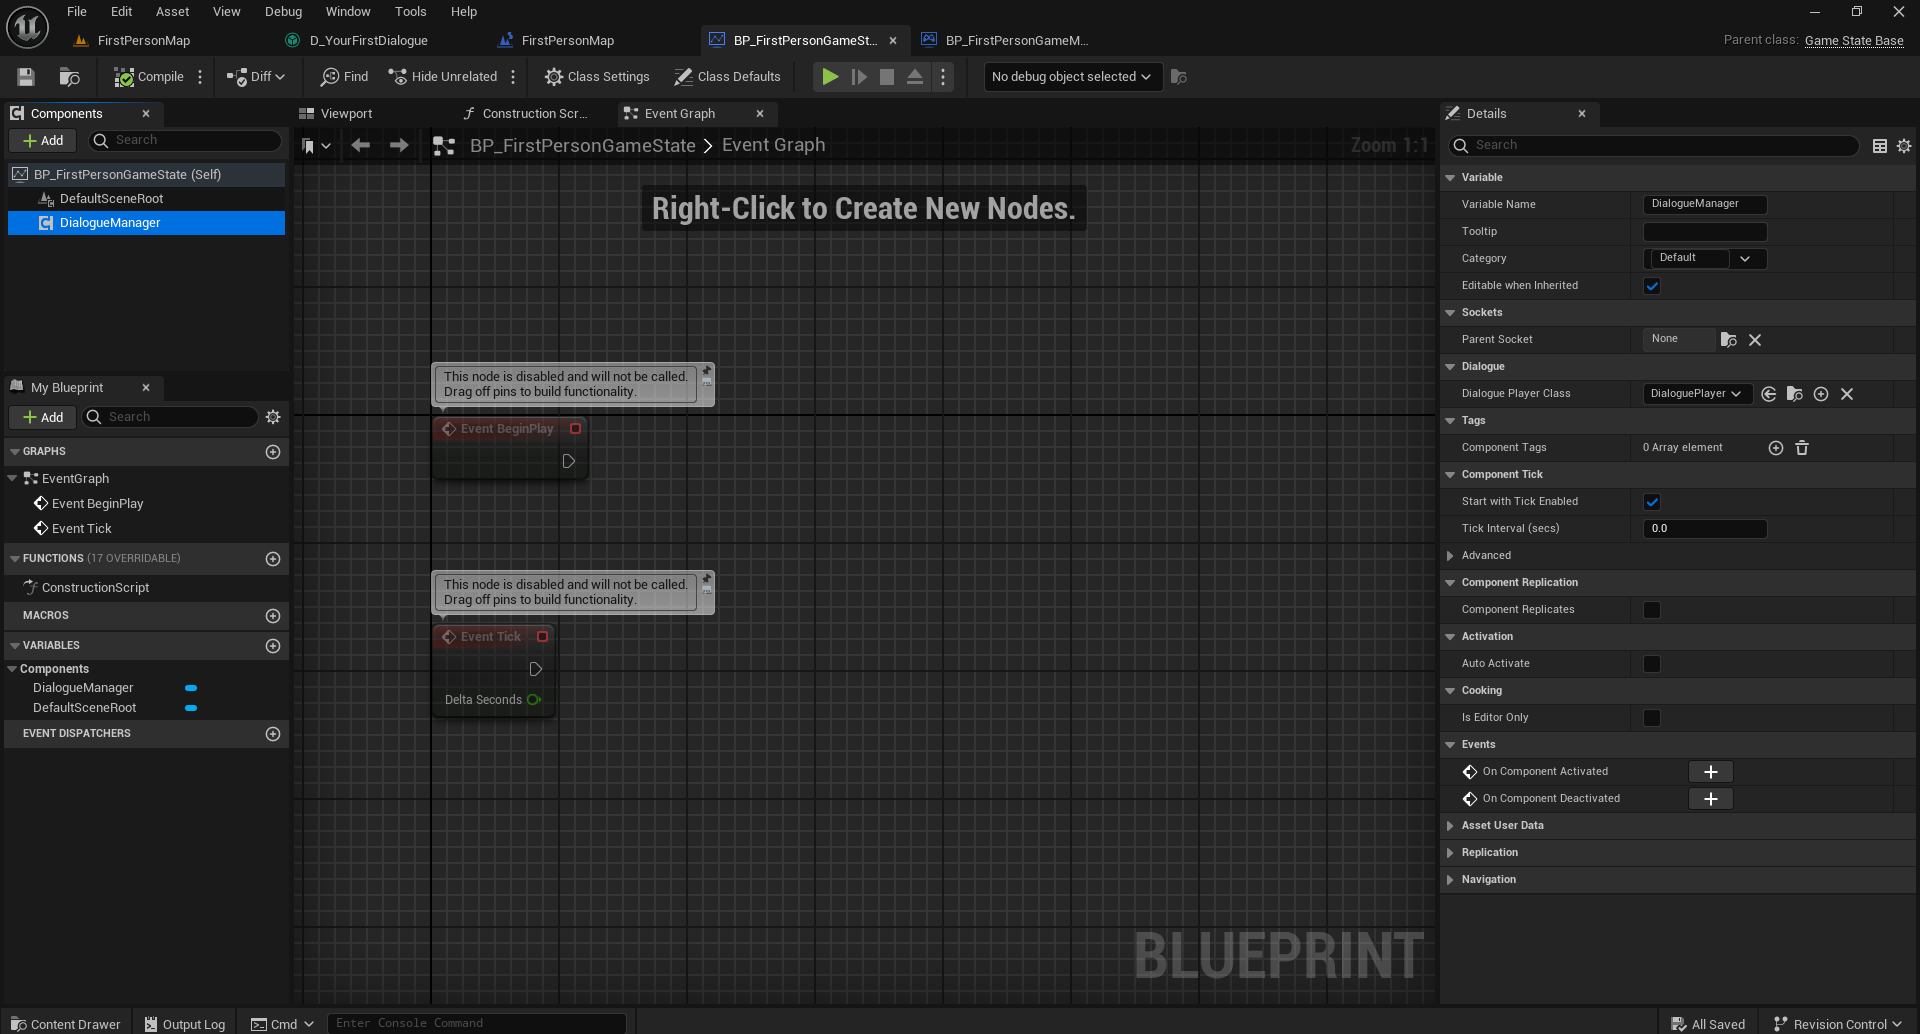
Create a Game State blueprint derived from AGameStateBase and call it BP_FirstPersonGameState. Open the blueprint and add a Manager component. The game state class must derive from AGameStateBase and not AGameState as the Game Mode class in the first person shooter template derives from AGameModeBase and not AGameMode. The dialogue manager is required to play the dialogue.
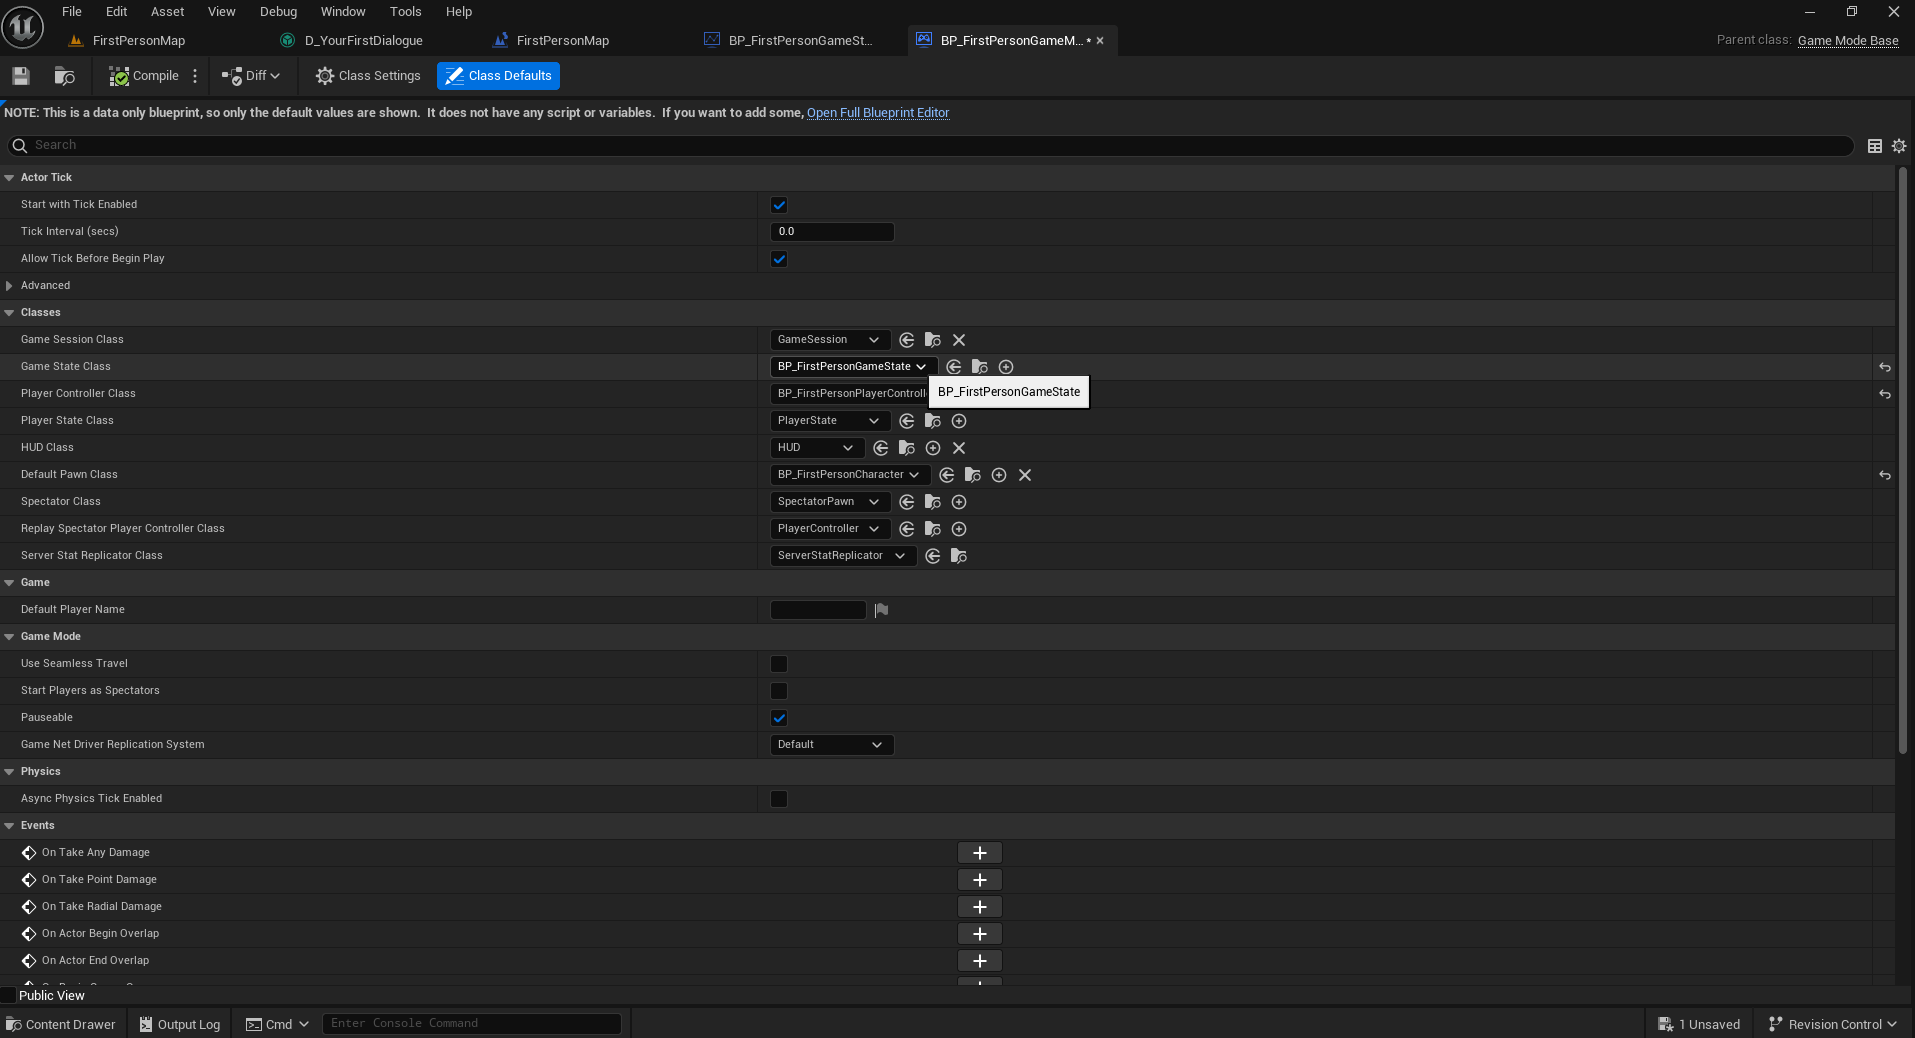
Open the BP_FirstPersonGameMode blueprint and set the Game State as BP_FirstPersonGameState.
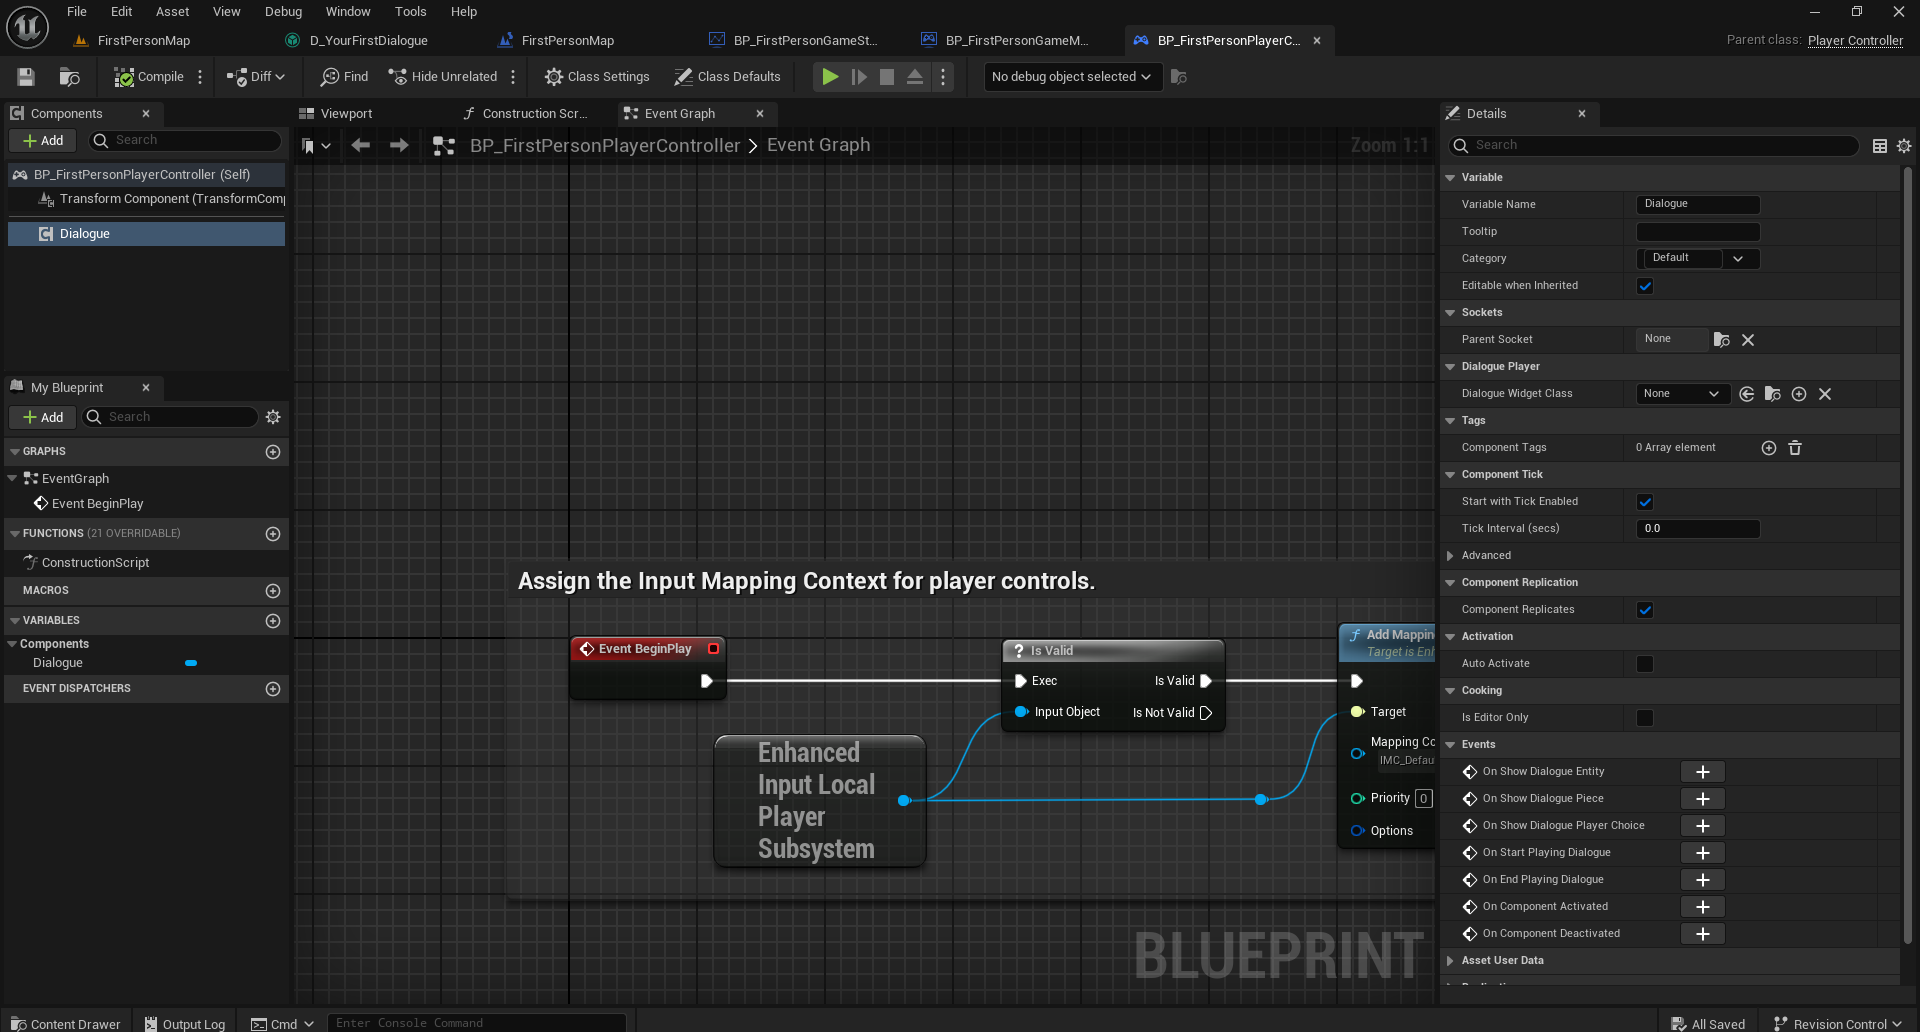
Open the BP_FirstPersonPlayerController blueprint and add a Dialogue Component component to it. The component is just called Dialogue in the editor. The dialogue component is required to show the dialogue to the player. It handles dialogue widgets, playing audio, and playing cinematics.
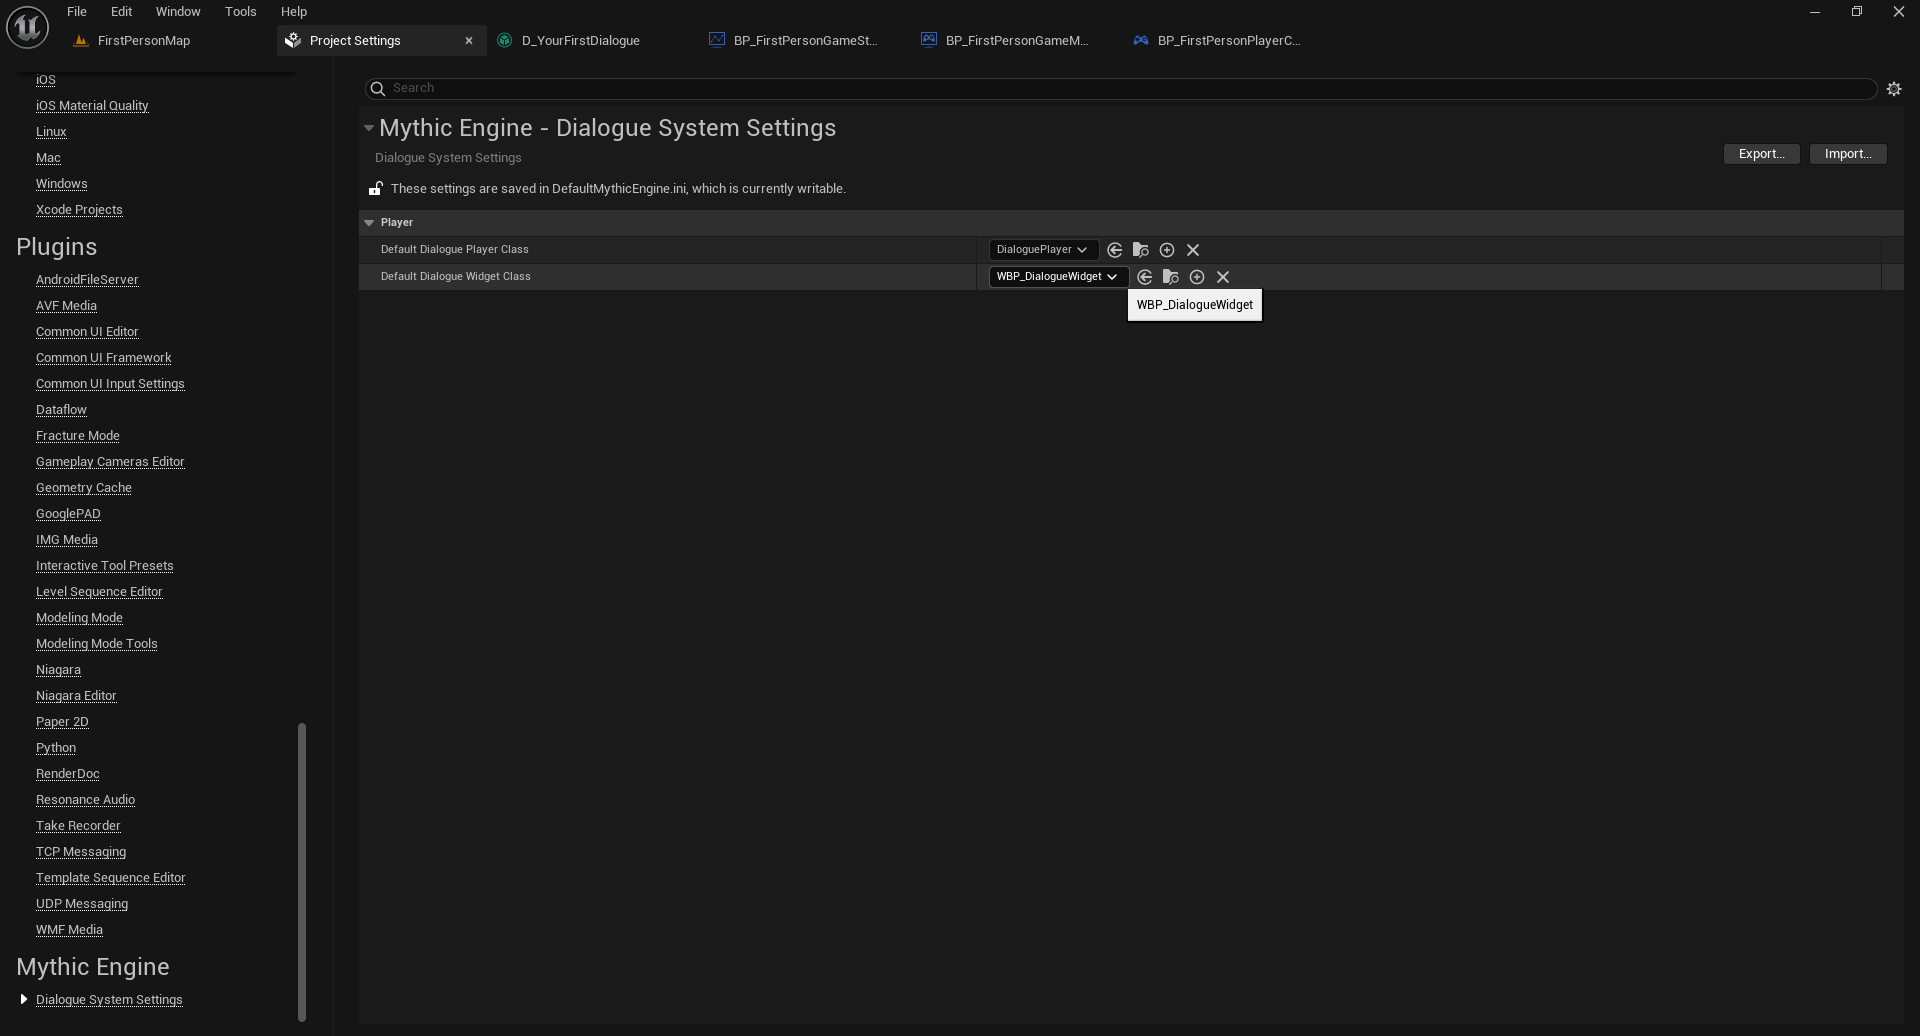
Open Project settings, scroll all the way down to Dialogue System Settings and make sure the Default Dialogue Widget Class is set to WBP_DialogueWidget. This is the widget used to show the dialogue texts on screen.
The dialogue system is ready to be used!
Creating the dialogue asset
Right click on the content browser and select Quest System -> Dialogue.
Name your dialogue asset. We recommend prefixing your asset with D_ so your dialogue asset can be D_YourFirstDialogue.
Double click the asset to open the editor. Your dialogue asset is ready for you to work with!
An intro to the dialogue editor
The dialogue editor interface is similar to the quest editor, except it has seperate details panels for the dialogue itself and the nodes in the dialogue graph.

To add a dialogue entity to your graph, drag and drop the entity from the palette, or right click on the graph and select the entity from the context menu.
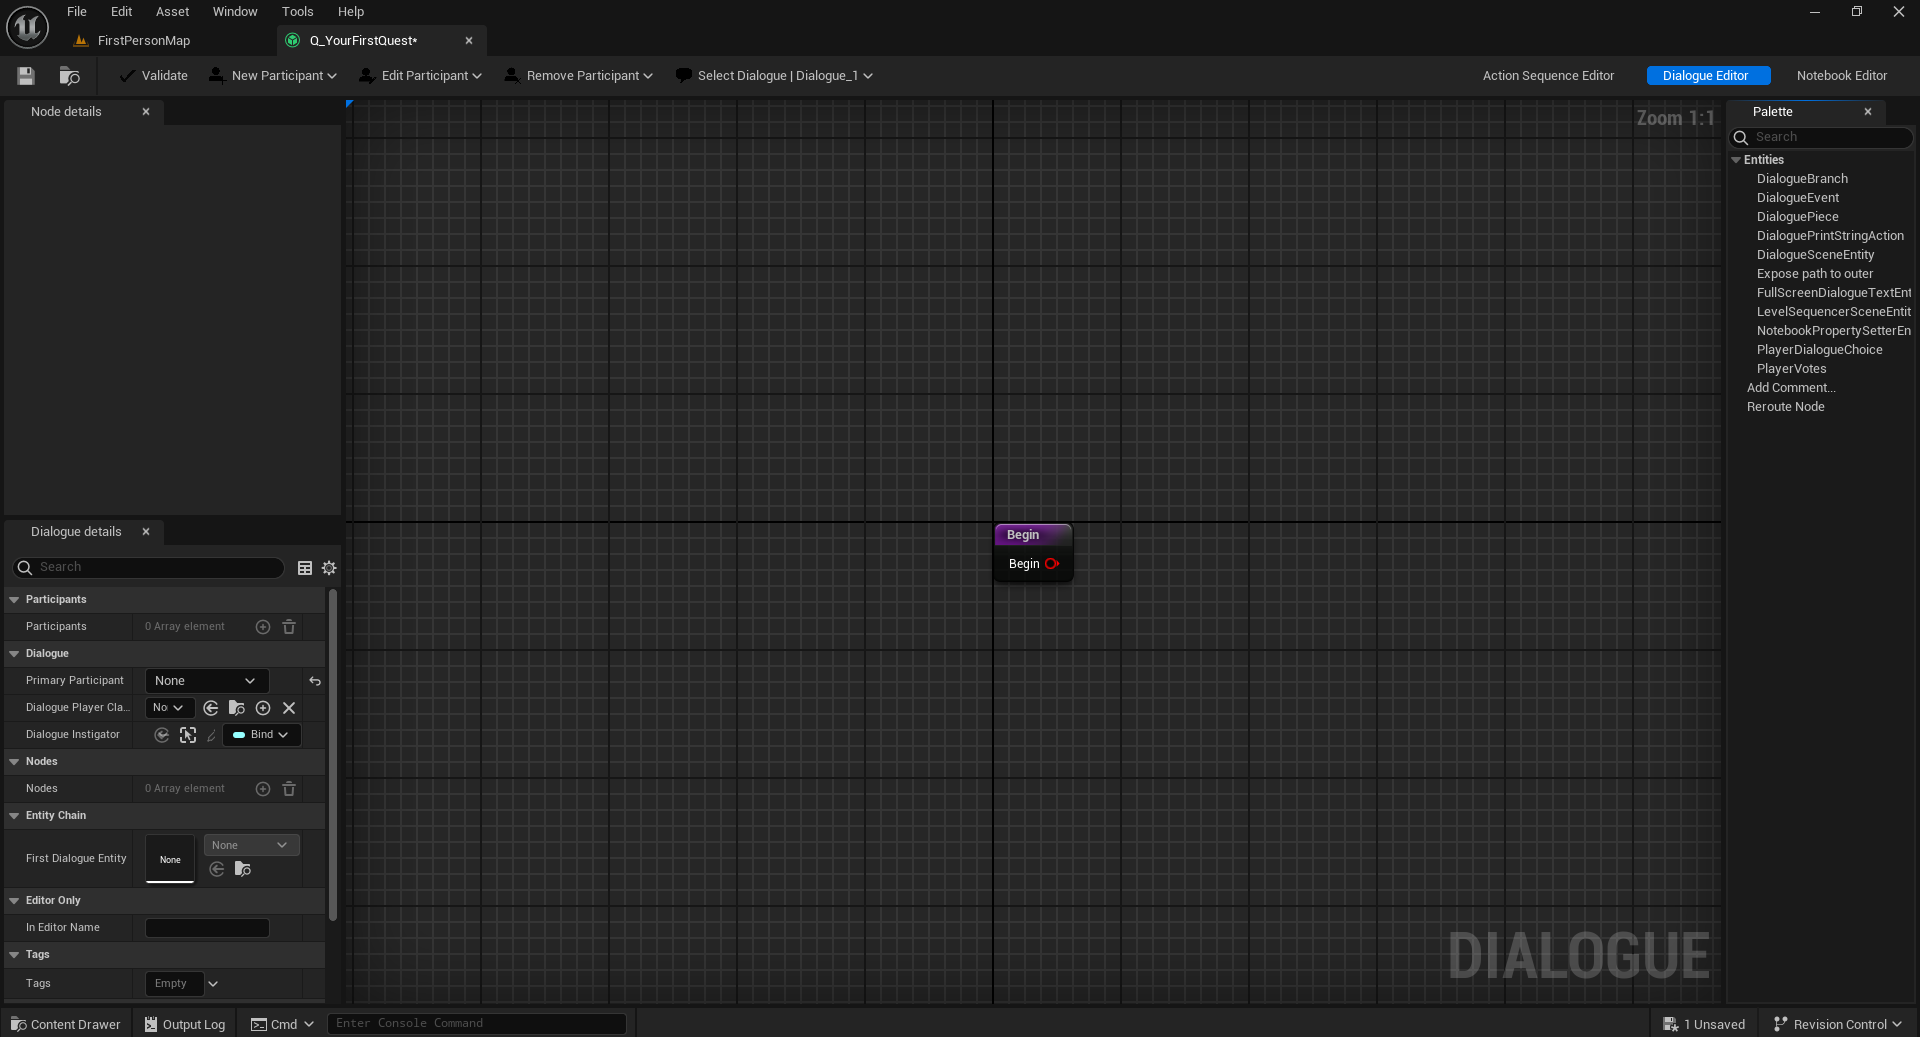
Every dialogue asset has a begin node. This node will fire when the dialogue starts playing and any entities connected to this node will be played.
Anatomy of a node

Dialogue entity nodes only have one input pin. This is the Play pin. Dialogue entity nodes can have multiple output pins.
Example dialogue
Lets create our very first dialogue! Follow the steps below to create a simple dialogue in which the player is greeted with a Hello, the player has two choices to reply with, and the two choices lead to different responses.
First we need to setup the participants for the dialogue. A dialogue will need the player character as a participant to play the dialogue to the player. Follow the steps below to add a participant.
-
Click on the New Participant button on the toolbar. This should open the Add New Participant menu.
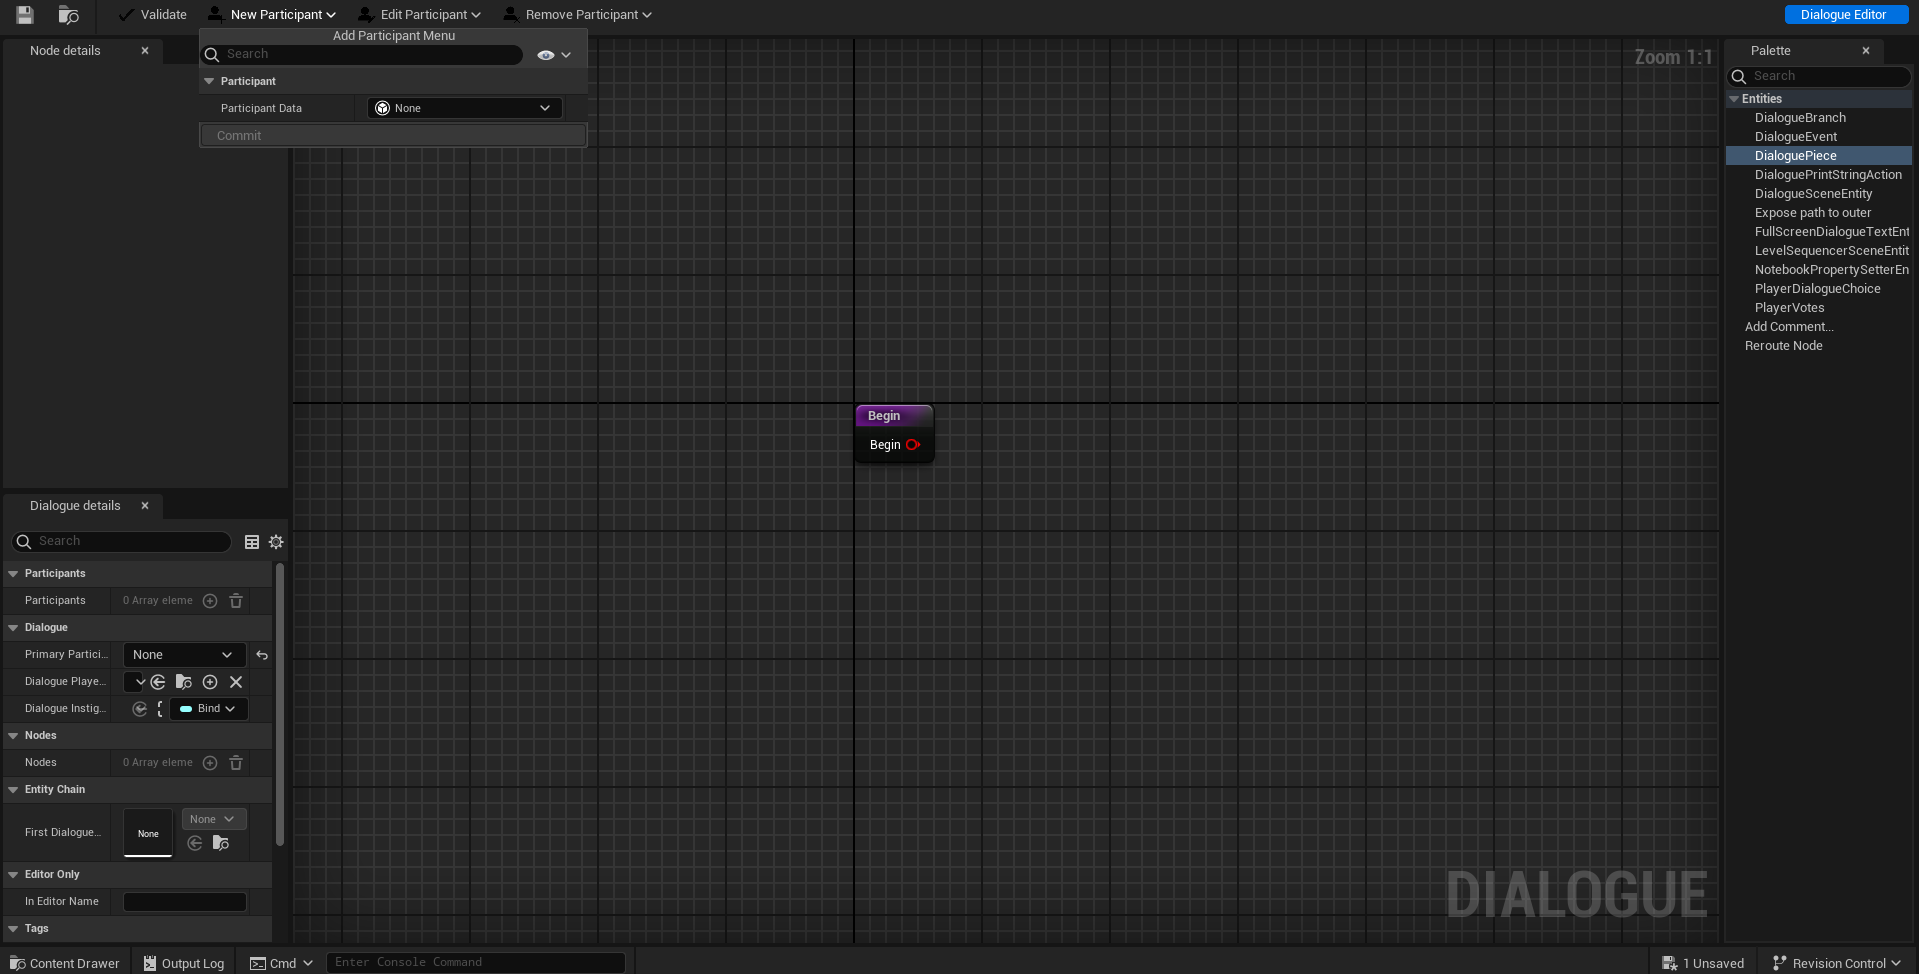
-
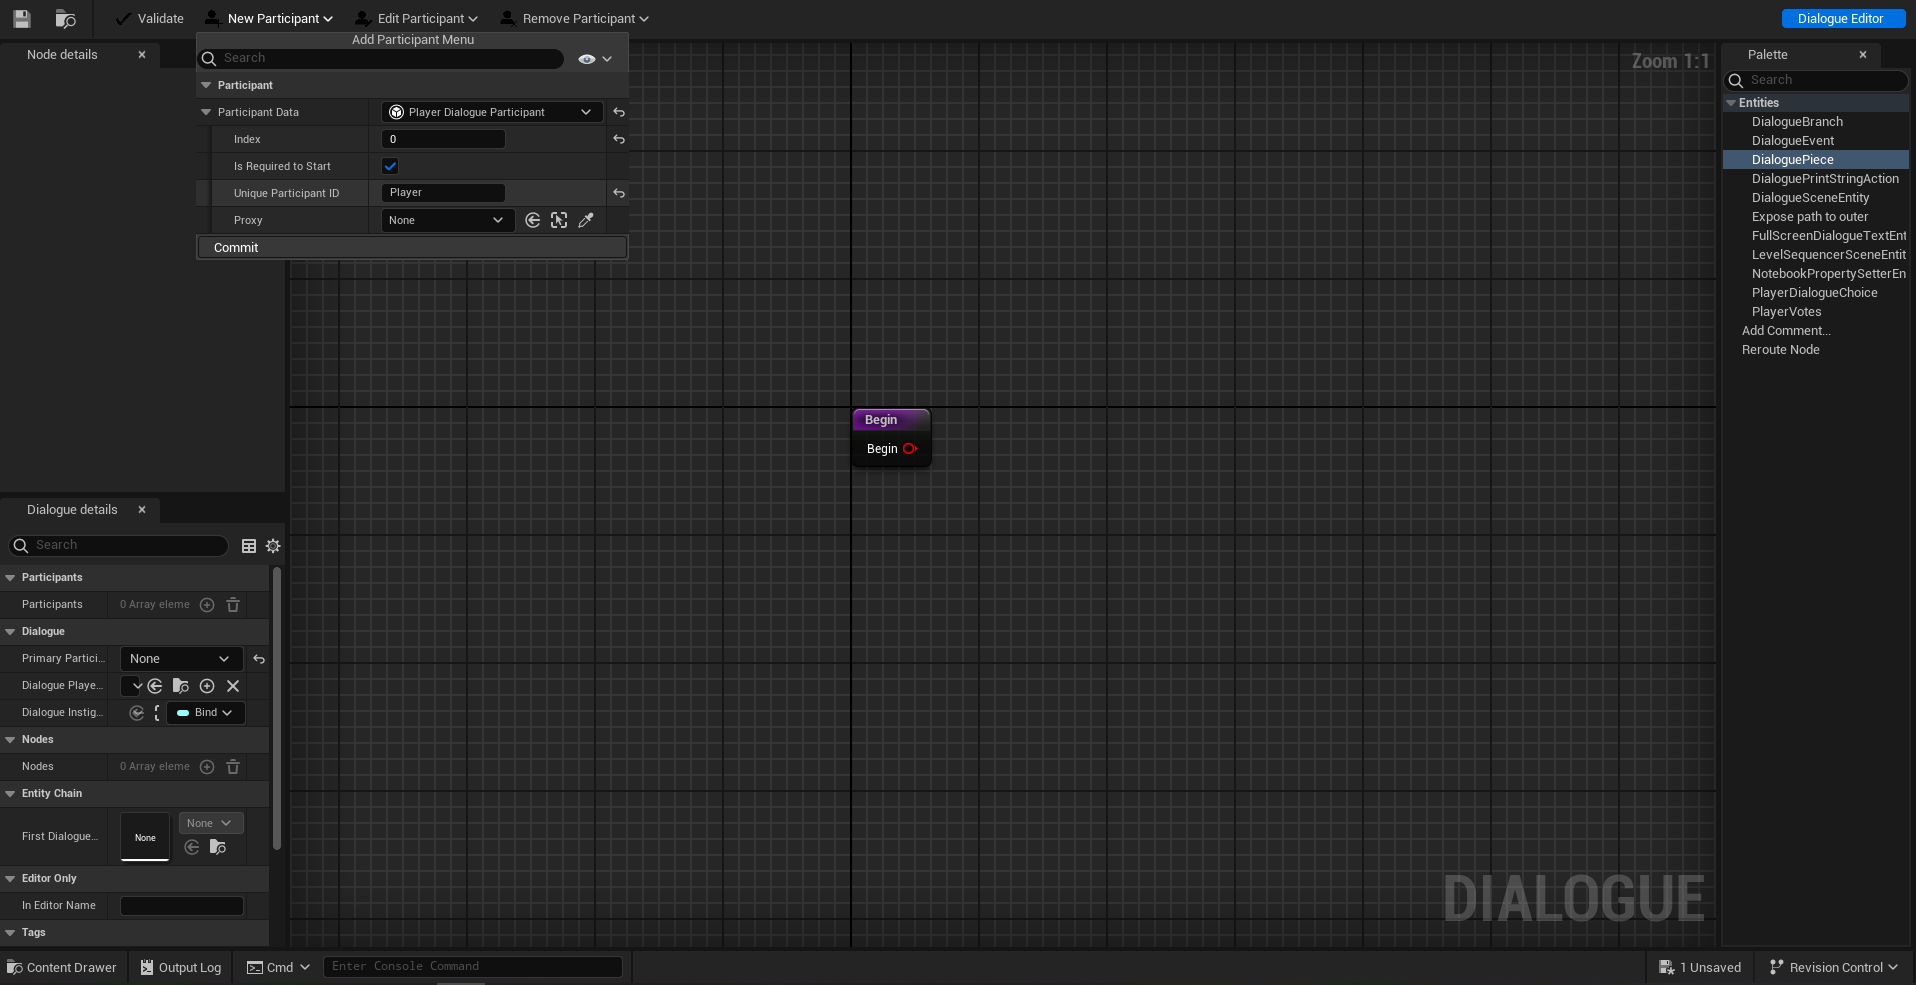
Select the type of participant. We need to represent the player character so select the Player Dialogue Participant type. Set the player index to 0, Set the Unique name for the participant to "Player and press Commit. We now have a participant for our dialogue.
-
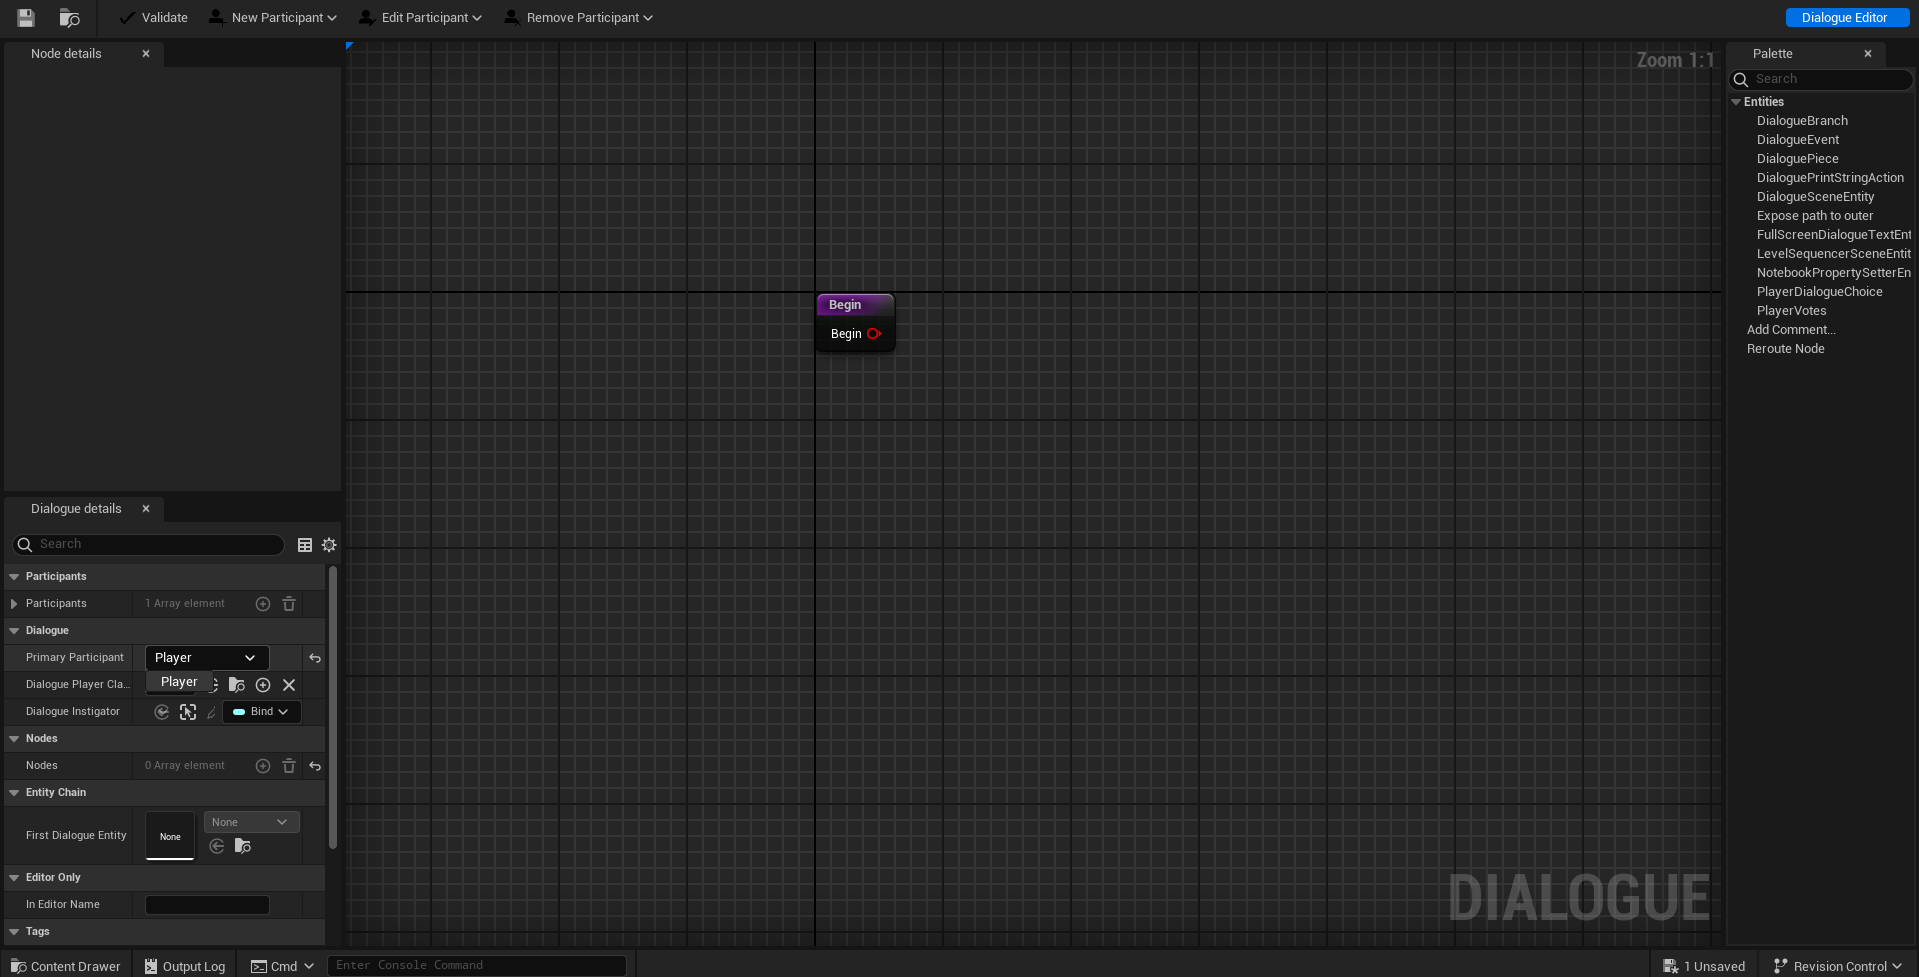
In the dialogue details panel, set the primary participant to the Player participant.
Let's now script our dialogue.
-
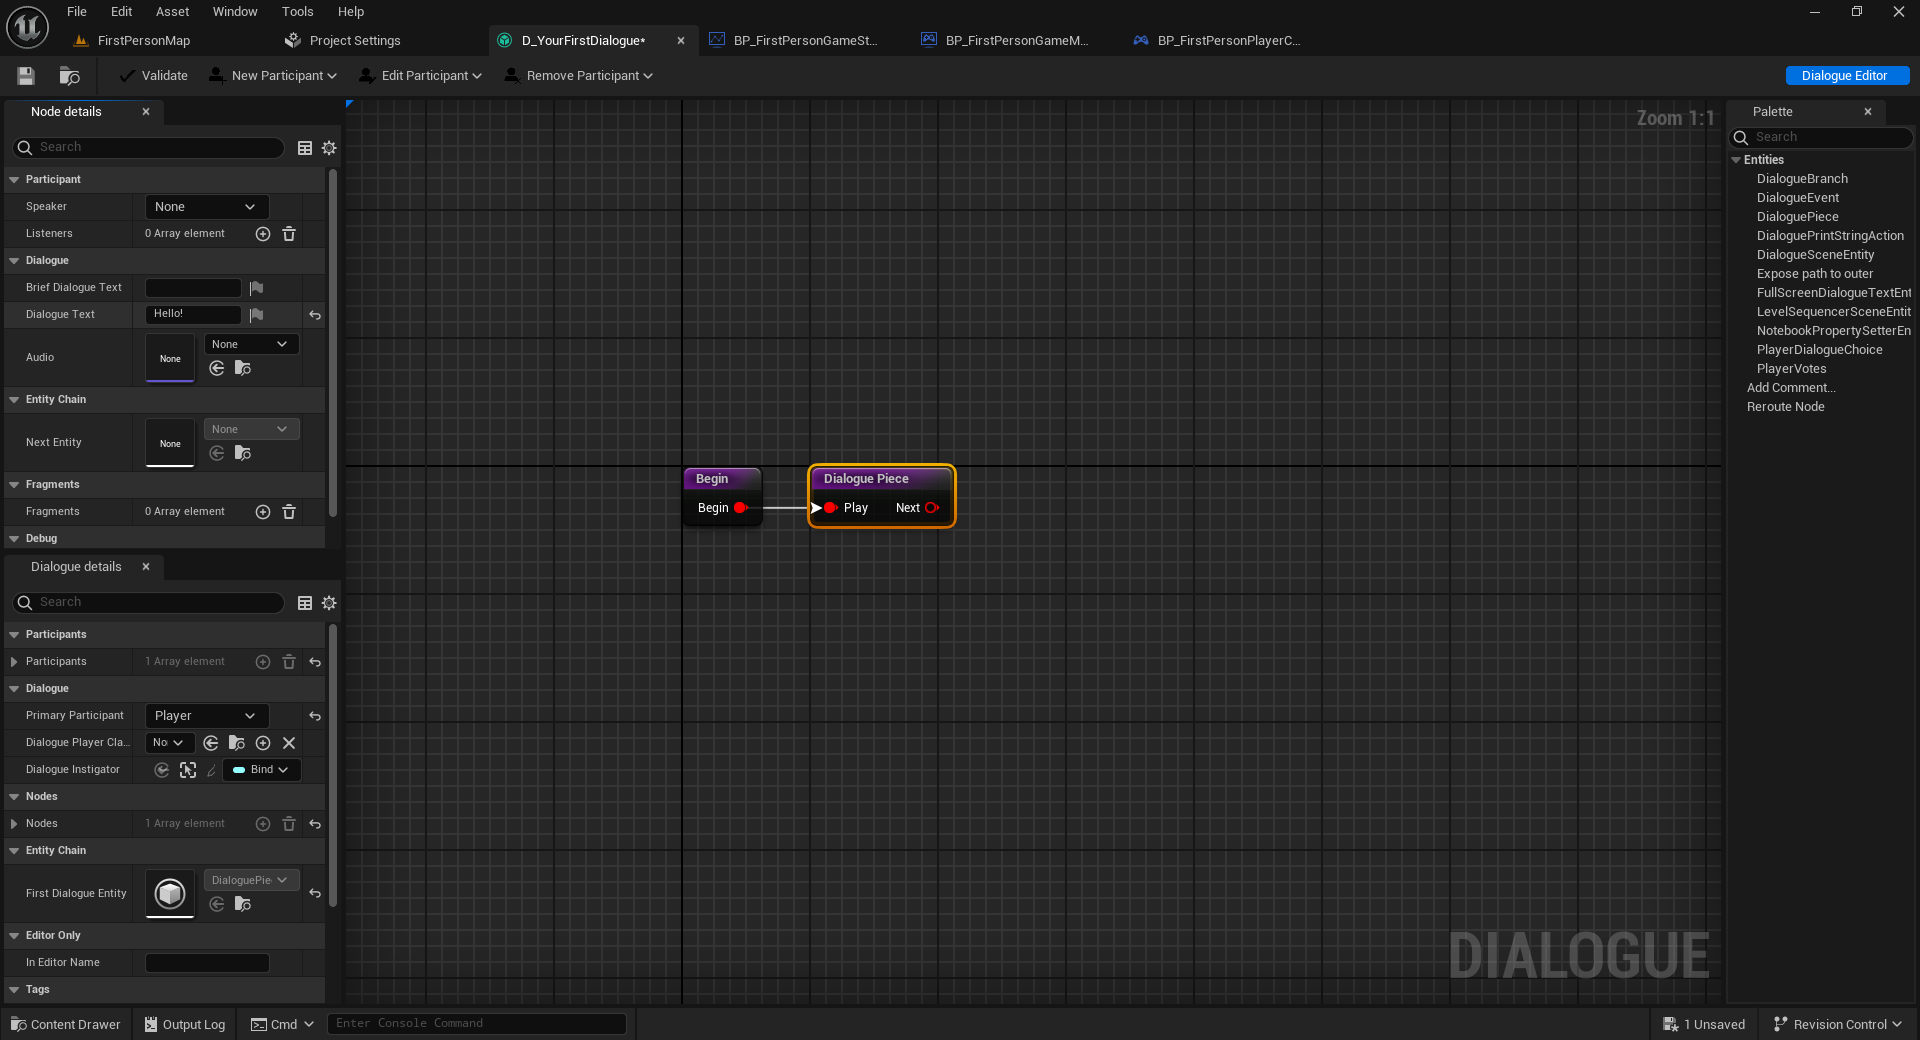
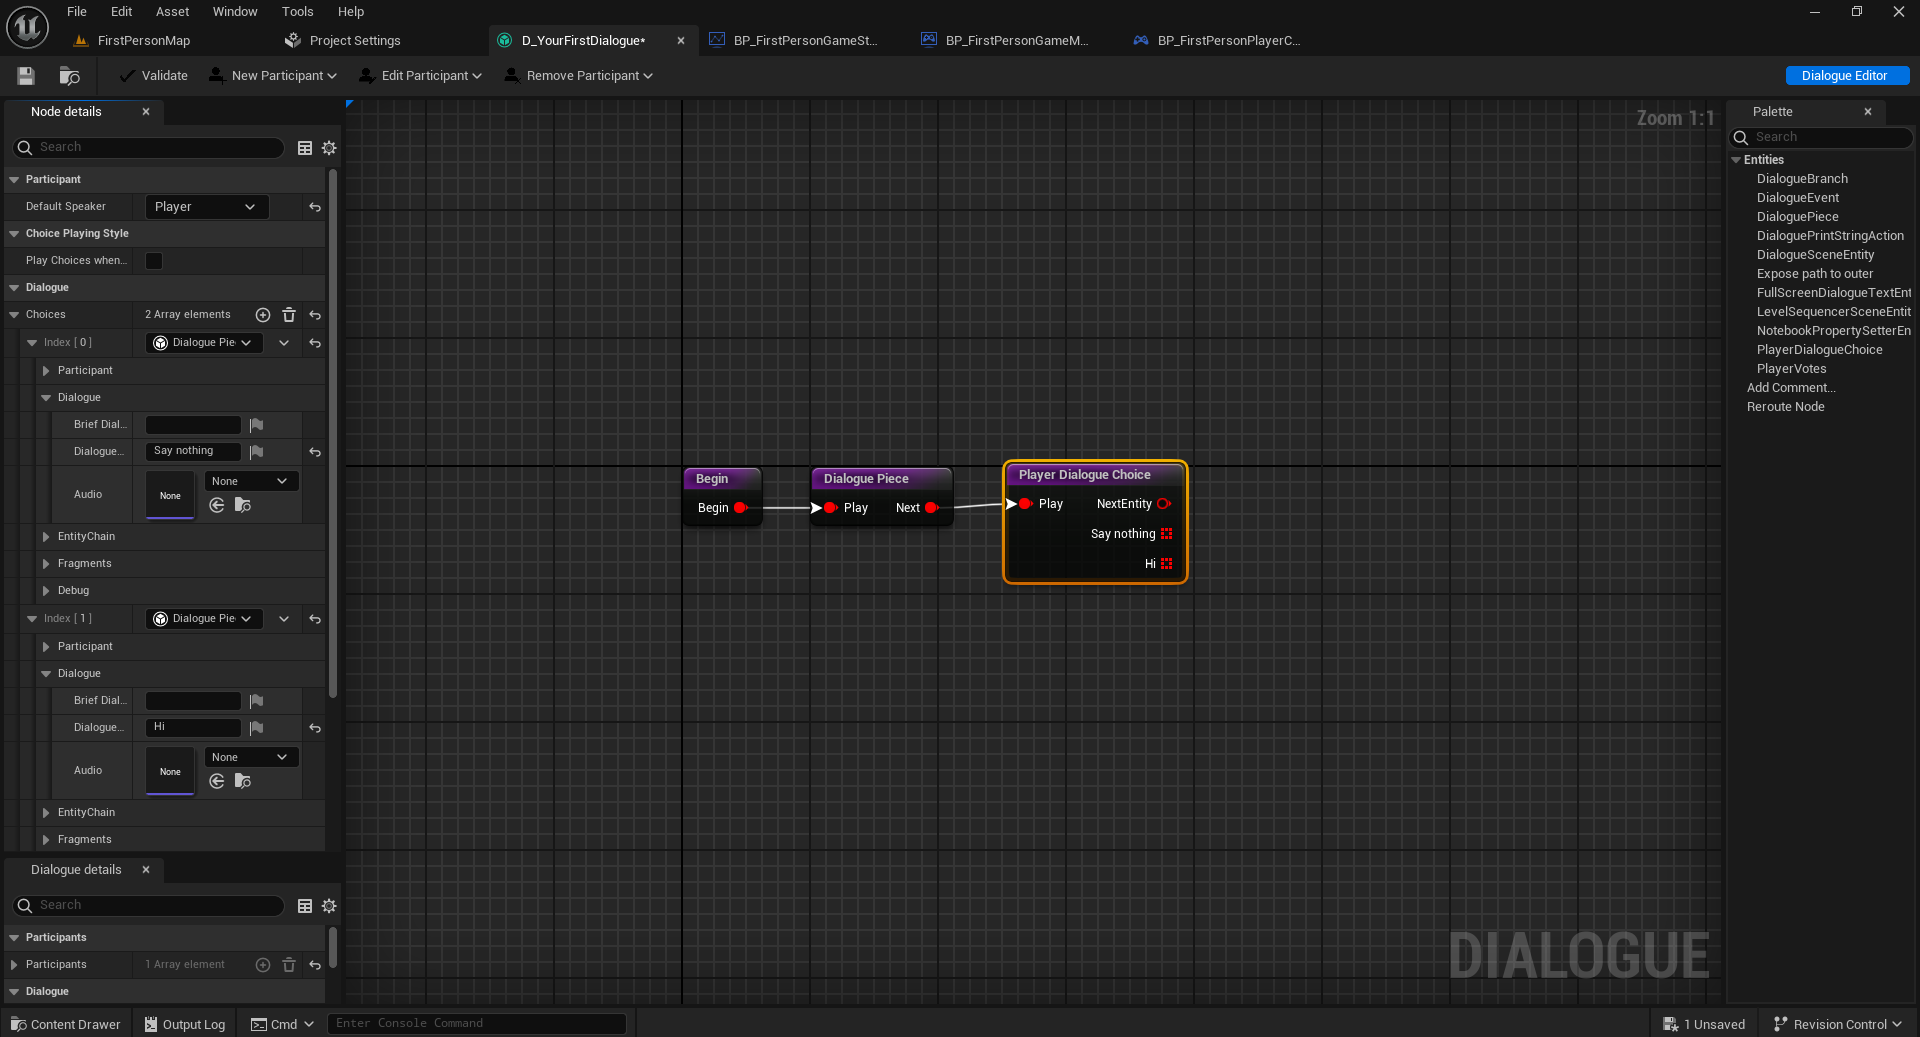
We want to show some text when the dialogue starts. In this example, the player is greeted with a "Hello". To show this, add a Dialogue Piece node to the graph and connect the begin node's output pin to the Play pin of the dialogue piece node.
-
The player should gets two choices on how to reply. Add a Player Dialogue Choice node. In the details panel, Add two elements in the Choices array and set them to the type Dialogue Piece. Fill the Dialogue Text field with your options. In this example, the player gets choices to either say nothing or say hi. The breif dialogue text field can be left empty as it is not used in this example. Since the player is the character replying, set the Default Speaker to the Player participant.
-
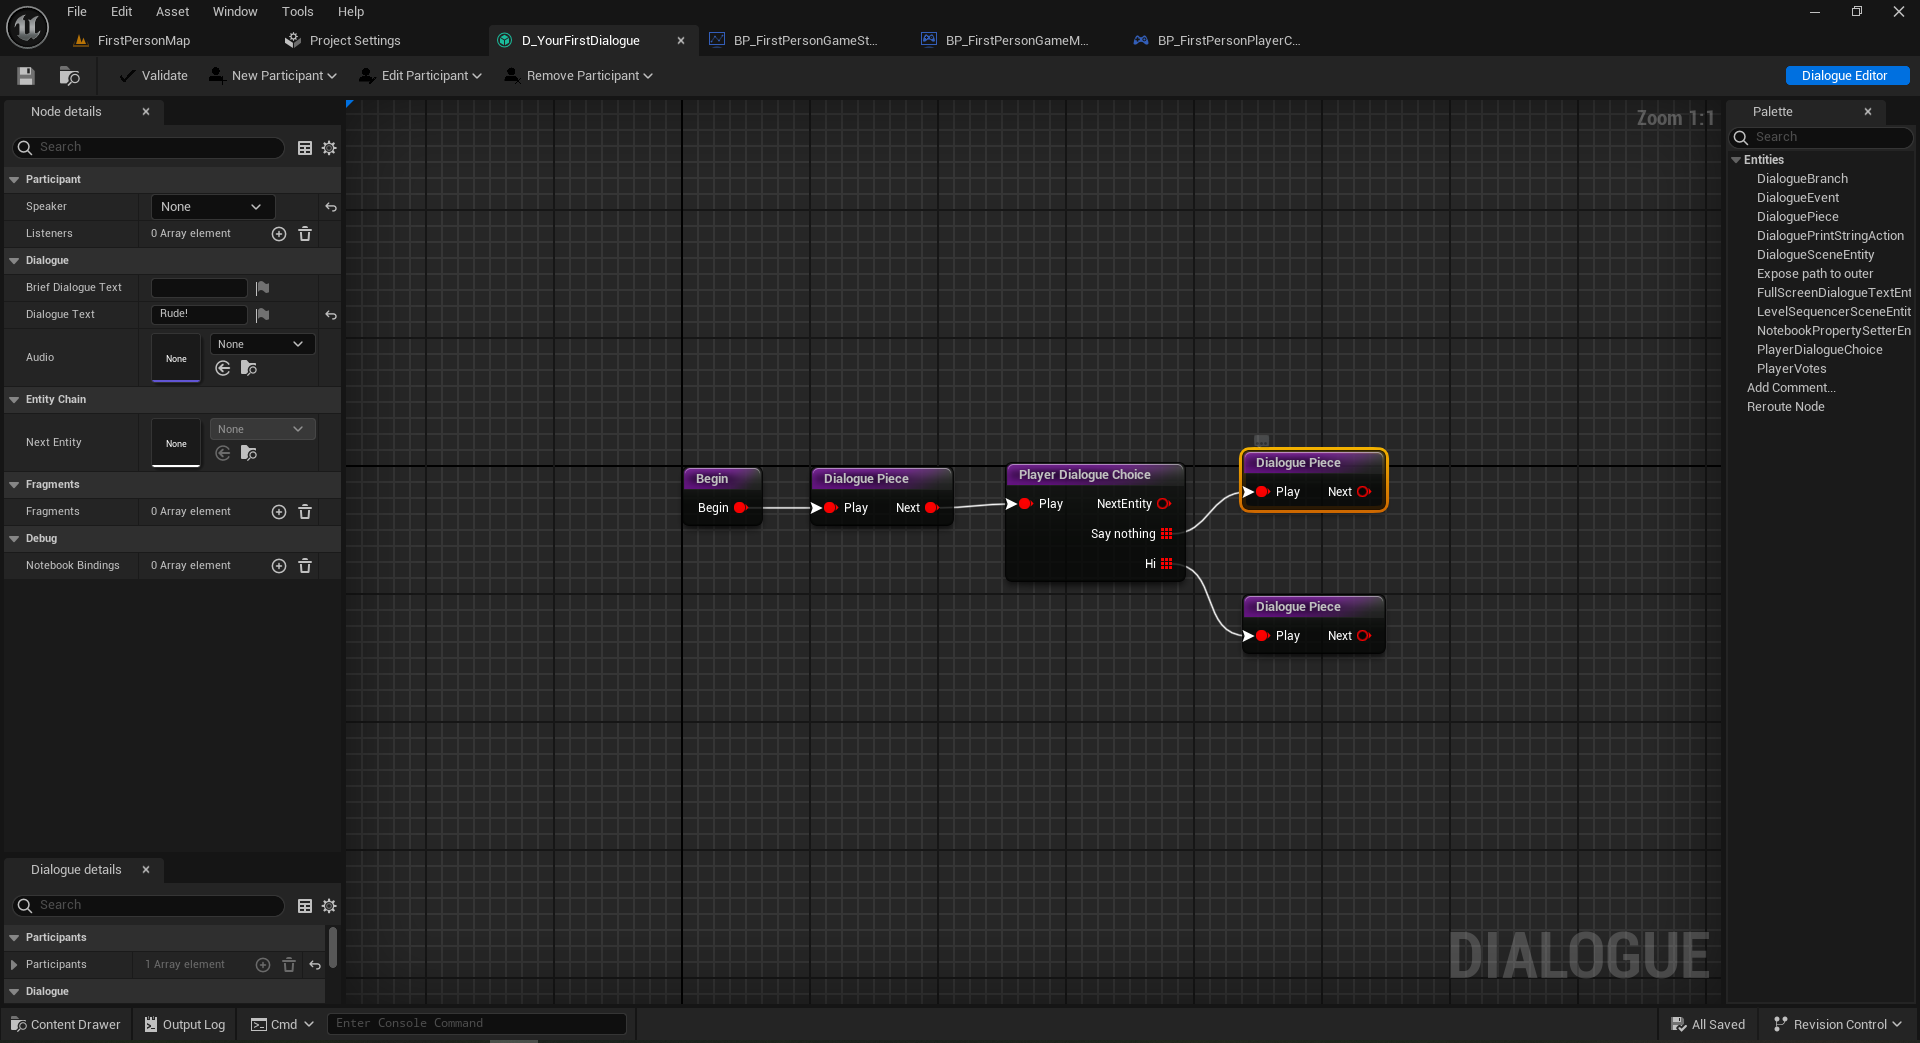
Add two Dialogue Piece nodes and connect them as shown below. These are the responses to the player choice. In this example the first response (to being ignored) is "Rude!" and the second response (to hi) is "How are you doing?".
Playing the dialogue
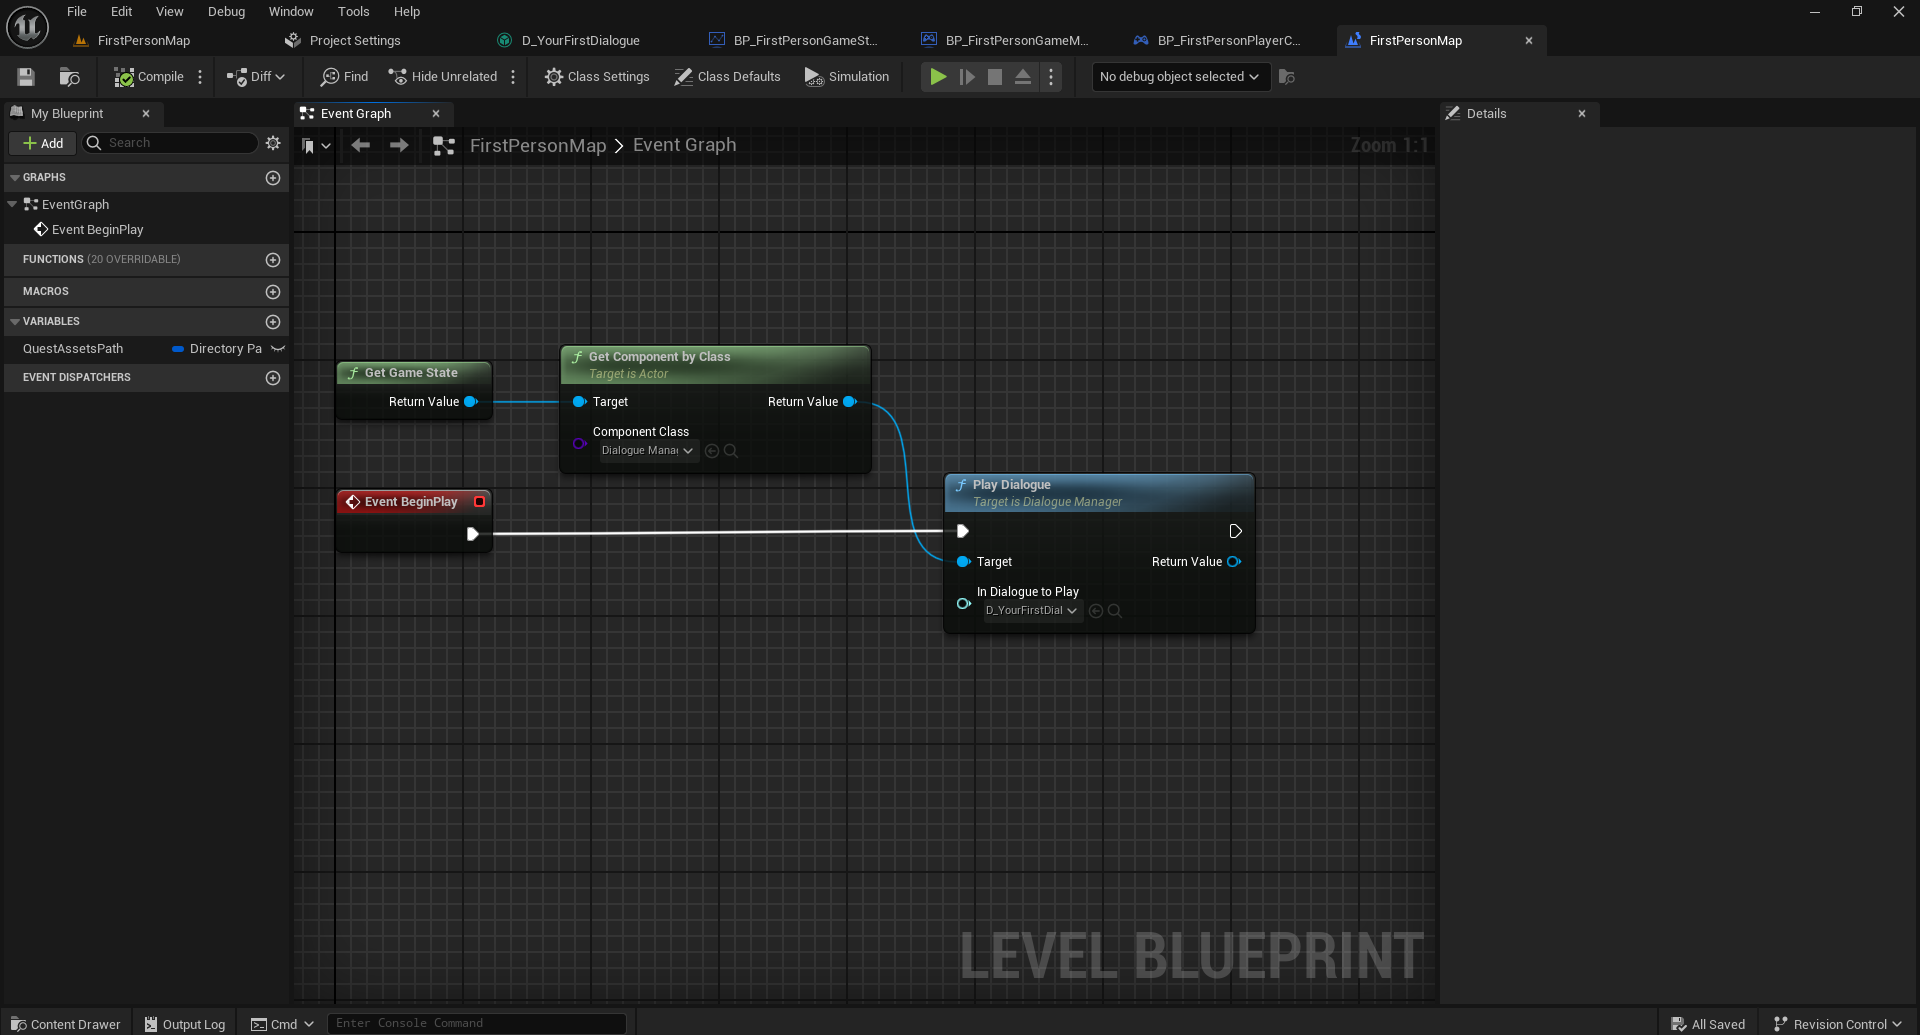
In this example we will play the dialogue from the level Blueprint. Open the level blueprint and override the function Event BeginPlay. Right click on the graph and search for Get Game State. pull from the Return Value pin and search for Get Component by Class. Set Component class to Dialogue Manager. Call Play Dialogue on the dialogue manager and pass it the dialogue asset D_YourFirstDialogue.
Hit play in the editor to start a PIE session. The dialogue should now play.
Your dialogue is ready!
Dialogues inside quests
Dialogues do not need to be their own assets. They can be created and edited inside a quest asset. Add a Dialogue action node to the graph to create a dialogue inside the quest.
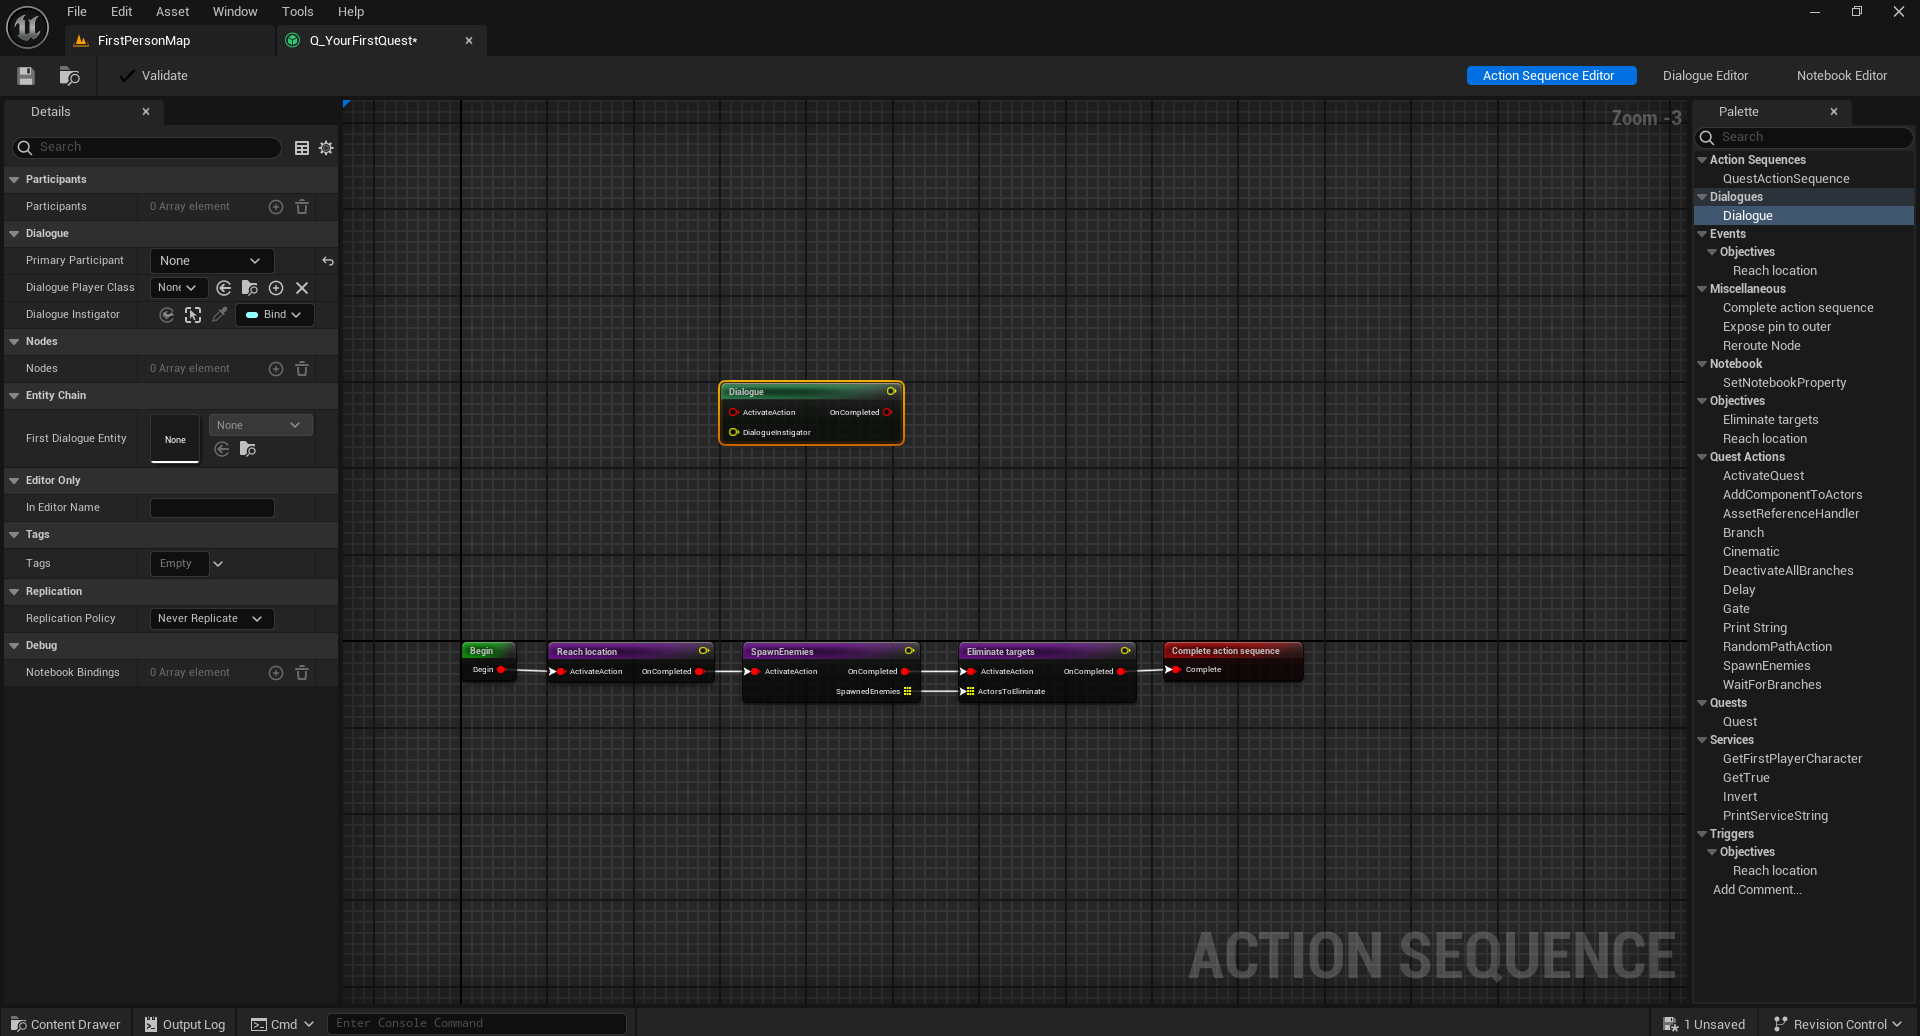
Double click the dialogue node to move to the Dialogue Editor mode to edit the dialogue.
These dialogues will be played by the quest manager automatically when the dialogue action is activated. The action is completed when the dialogue has finished playing.